WoCommerce is an outstanding eCommerce plugin because of its exceptional flexibility. It offers tons of customizable features by which you can meet the specific needs of users. By default, the WooCommerce shop page displays 16 products in 4 rows by 4 columns grid.
But if you have more products in the inventory, you may want to display more products on the shop page. This article will help how to change the WooCommerce number of products per page so you can adjust the number that best fits your need.
Why You May Want to Change the WooCommerce Number of Products Per Page?
There are many reasons that can trigger you to change the WooCommerce number of products per page. We have pointed out some most important of them in the list below.
- To make it easy for customers to quickly explore your products, especially when you have a big collection.
- To hold visitors and customers’ attention to products instead of other web elements.
- To maximize revenue by convincing customers to fall for the products instantly.
- To improve the accessibility of your website by ensuring all your products are displayed correctly.
How to Change the WooCommerce Number of Products Per Page
There are several methods to adjust the WooCommerce number of products per page. We’ll cover several methods of them in this section.
Method 01: Using the Theme Customizer
The best and easiest way to change the WooCommerce number of products per page is from the theme customizer option. If you are using any WooCommerce-friendly theme, the below steps will be almost the same on your website.
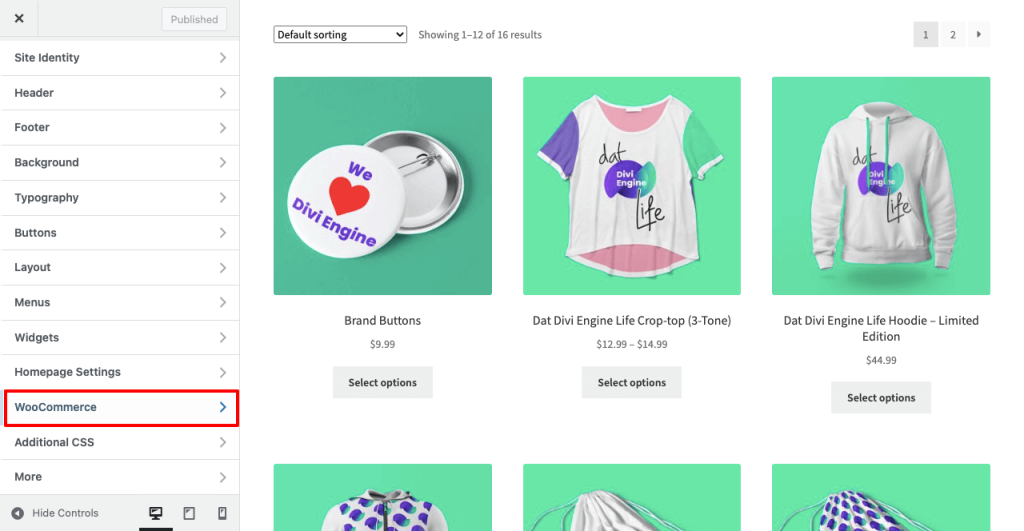
- Log in to the WordPress dashboard.
- Go to Appearance > Customize.
- Find WooCommerce by scrolling down the right section.
- Navigate to WooCommerce > Product Catalogue.
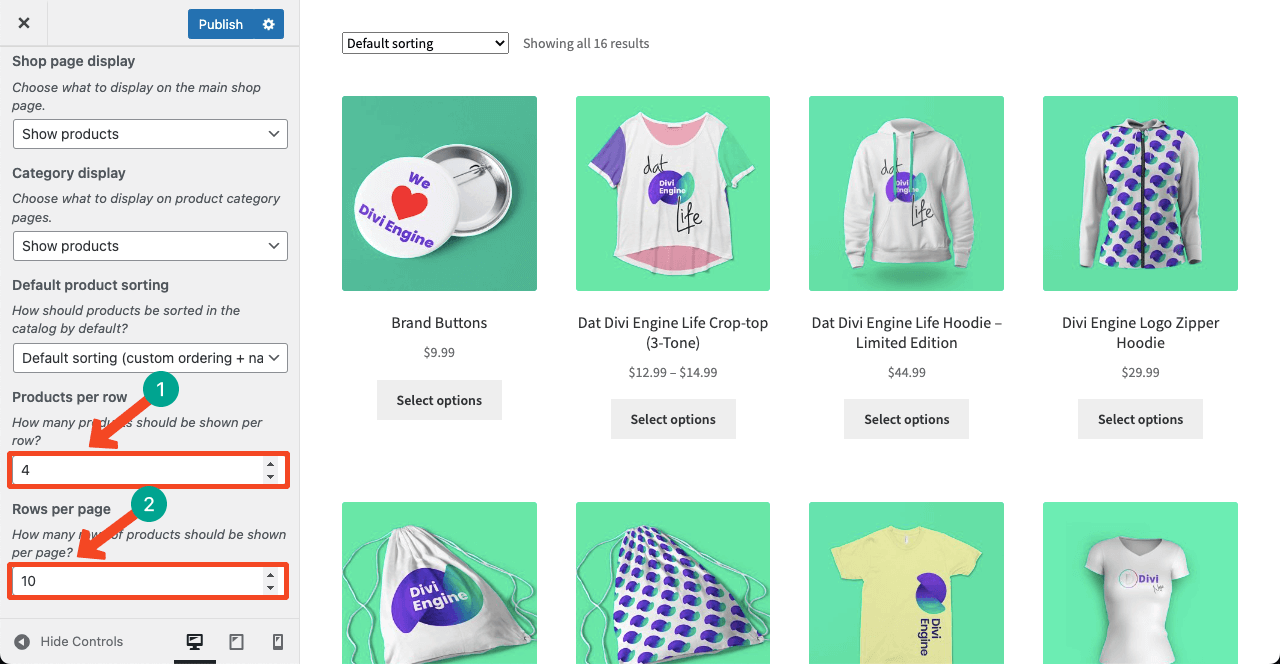
- Change Product per row.
- Change Rows per page.
- Hit the Publish button once you are done.
Thus you can customize the number of WooCommerce products per page using the theme customize option. But there are some themes that don’t have this option. In this case, you have to change your theme and select a WooCommerce-friendly one.
Method 02: Using Code Snippet
If your theme doesn’t have the default WooCommerce setting or a custom option to change the WooCommerce number of products per page, you can add a snippet of code to the functions.php file of your activated theme.
Copy and paste the below code at the end of the functions.php file. Just replace the value 16 with the number you wish. This will define the number of products.
// Change the Number of WooCommerce Products Displayed Per Page
add_filter( ‘loop_shop_per_page’, ‘lw_loop_shop_per_page’, 30 );
function lw_loop_shop_per_page( $products ) {
$products = 16;
return $products;
}
If the above code snippet doesn’t work, you can also use this code.
// Change the Number of WooCommerce Products Displayed Per Page
add_filter( ‘loop_shop_per_page’, create_function( ‘$products’, ‘return 16;’ ), 30 );
Method 03: Changing the Number of Column Per Page
Increasing the column number will automatically change the number of WooCommerce products per page. If your activated theme doesn’t have the option to do that, you can use the following code.
// Change the Number of Columns Displayed Per Page
add_filter( ‘loop_shop_columns’, ‘lw_loop_shop_columns’ );
function lw_loop_shop_columns( $columns ) {
$columns = 8;
return $columns;
}
Method 04: Using a WordPress Plugin
If you are a no-code user and want to avoid the hassle of writing code, using a plugin can be a suitable solution. Though there are many plugins in the repository, we recommend you use the WooCommerce Products Per Page plugin.
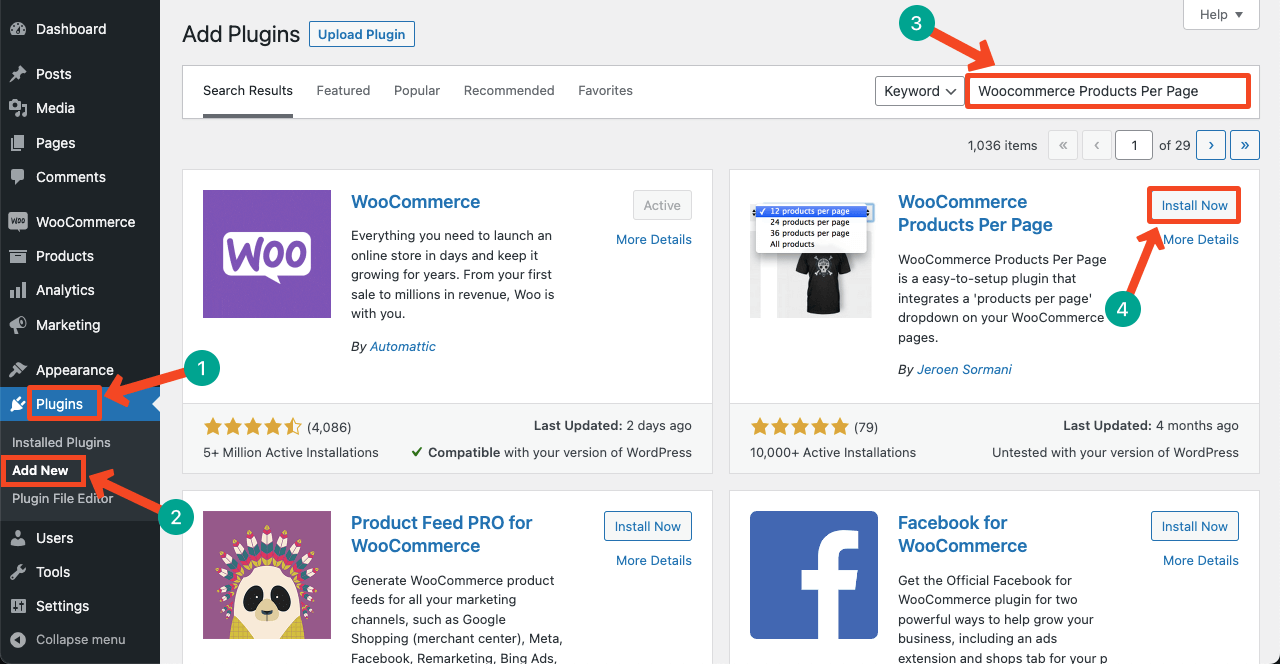
- Go to Plugins > Add New.
- Type Woocommerce Products Per Page in the search box.
- Install and Activate the plugin once it appears below.
- Once you have activated the plugin, an option to change the default product per page will be added in WooCommerce Settings.
- Navigate to WooCommerce > Settings > Products.
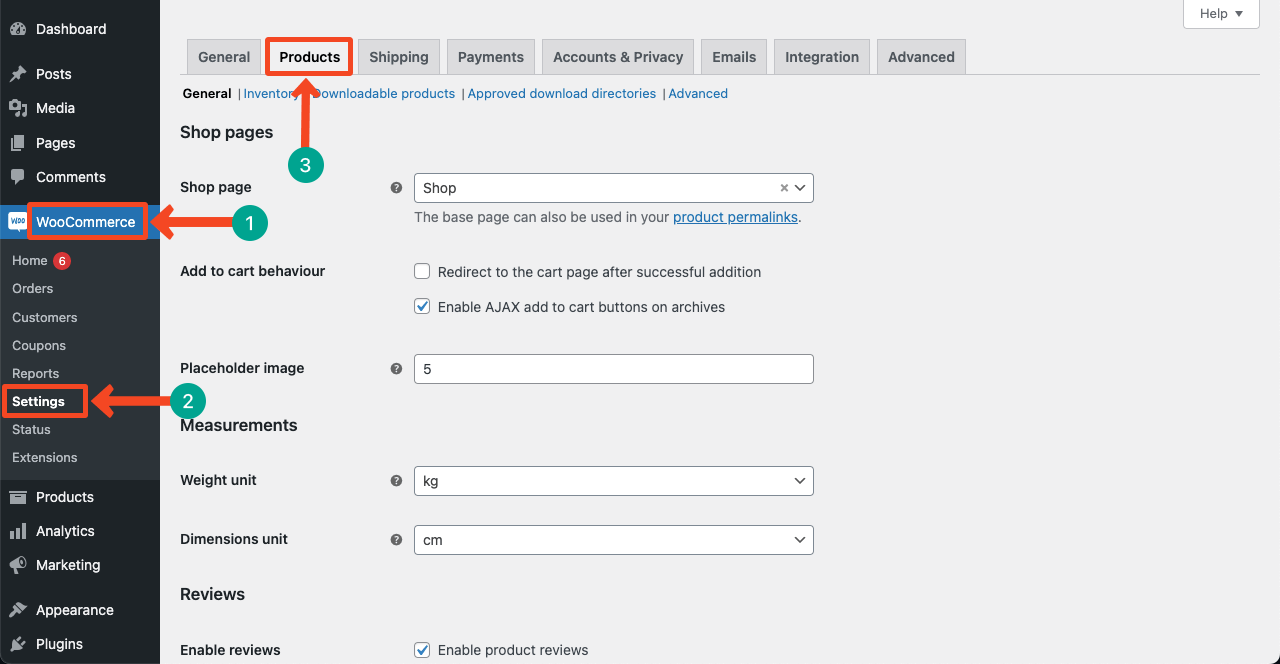
- Scroll down the page a bit.
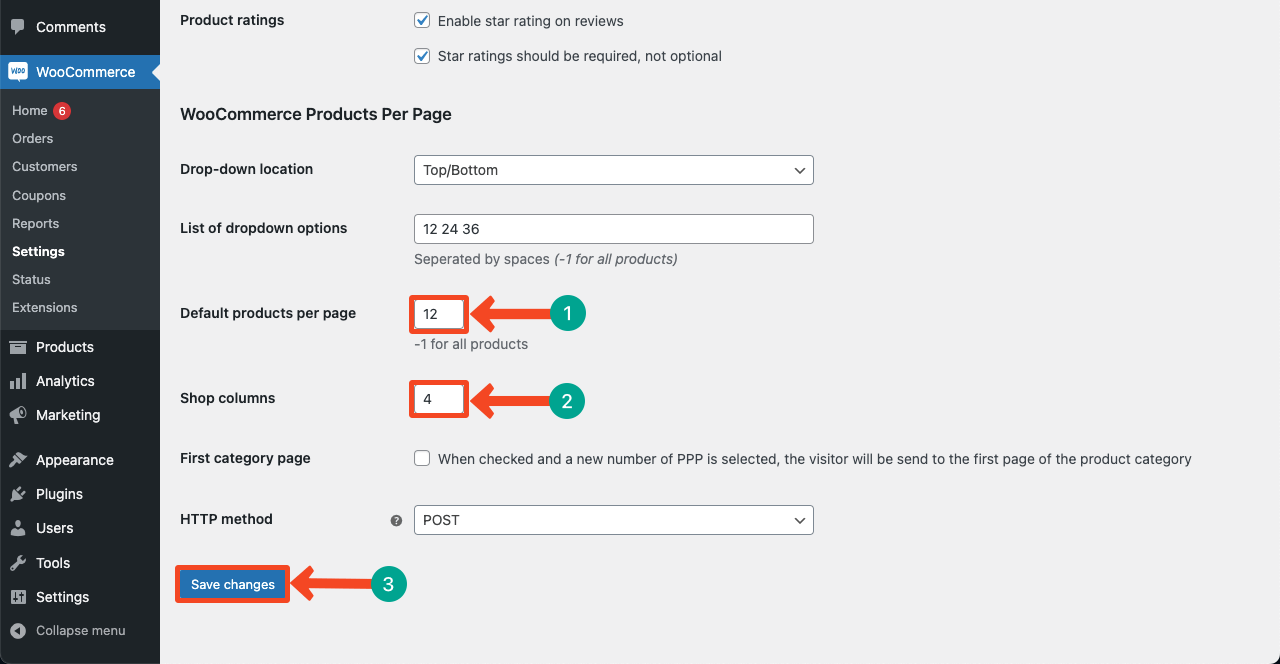
- You’ll get options to change the default products per page and shop columns.
- When you are done with editing, press the Save changes button.
Final Takeaway!
These are all the popular ways to change the number of WooCommerce products per page. Hope you have enjoyed and learned them well. It’s now up to you to implement these guides on your websites and see the changes. If you face any trouble in the way, type your problem in the comment box.
Leave a Reply