
A sidebar is a vertical column or section appearing either on the right or left side of a web page. It usually contains additional information and a navigational gateway from where people can jump into different web sections. Having a sidebar can have a significant impact on the WooCommerce shop page.
You can use it to display product categories, filtering options, promotional content, and more. This article will show you the easiest way how to add a sidebar to the WooCommerce shop page. Let’s get started!
Why Should You Add Sidebar to WooCommerce Shop Page?
When visitors land on any of your blog posts, you may want them to spend more time on your website and explore other content. One great way to do this is to include a sidebar featuring widgets like a search bar, related posts, and an opt-in form.
But the same widgets may not be equally effective on the WooCommerce shop page. Because the main objective of this page is to generate sales and conversions. So, instead of generic widgets, you must display WooCommerce-specific widgets on different pages using custom sidebars.
Some popular WooCommerce-specific widgets are:
- Products
- Product Search
- Product Categories
- Product by Rating
- Product by Tag Cloud
- Cart
Below are the page WooCommerce pages where you can add these widgets:
- Shop Page
- Product Categories
- Product Tags
- Products
- Cart Page
- Checkout Page
- Account Page
How to Add Sidebar to WooCommerce Shop Page
In this tutorial, we’ll use the WooSidebars plugin. It provides the easiest ways and options to add custom sidebars to different WooCommerce pages without any technical skills.
Step 01: Install and Activate the WooSidebars Plugin
- Navigate to WordPress dashboard > Plugins > Add New.
- Type WooSidebars on the search box.
- Install and activate the plugin once it appears below.

Step 02: Select Widget for the Sidebar
Installing and activating the plugin will add a new option ‘Widget Areas’ under the Appearance section.
- Go to Appearance > Widget Areas.
- Click on Add New.
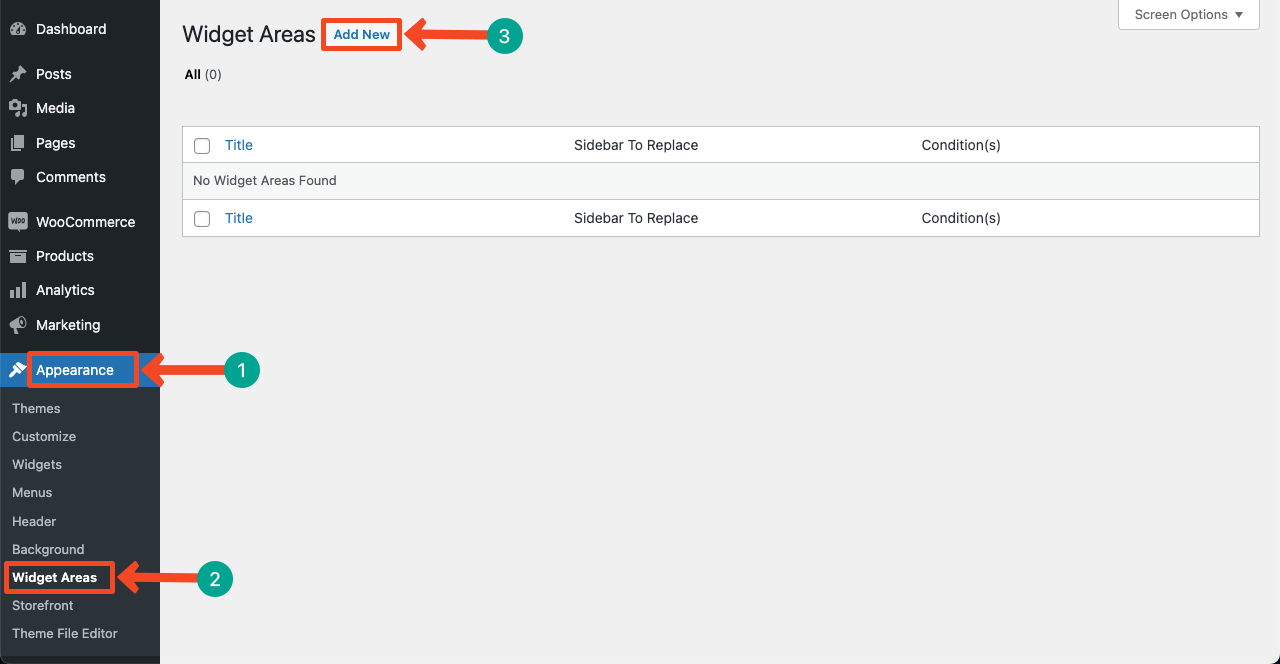
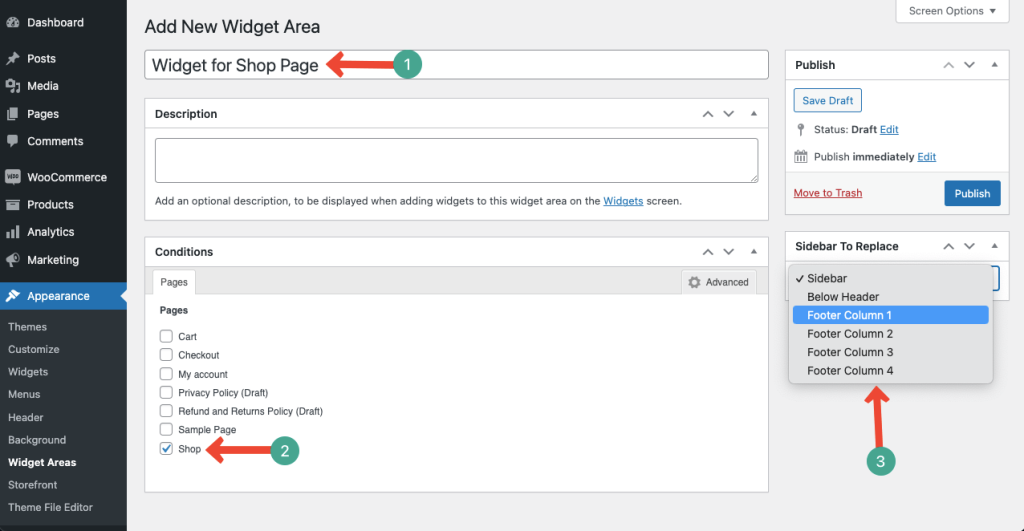
- Give a name to the widget so you can recognize it later.
- Tick mark the page for which you are creating this custom sidebar widget.
- Click the dropdown icon under the Sidebar to Replace option.
- You’ll get a list of default widgets.
- Select the one you like.
- Hit the Publish button at the end.
Note: We have selected the Sidebar for this tutorial.
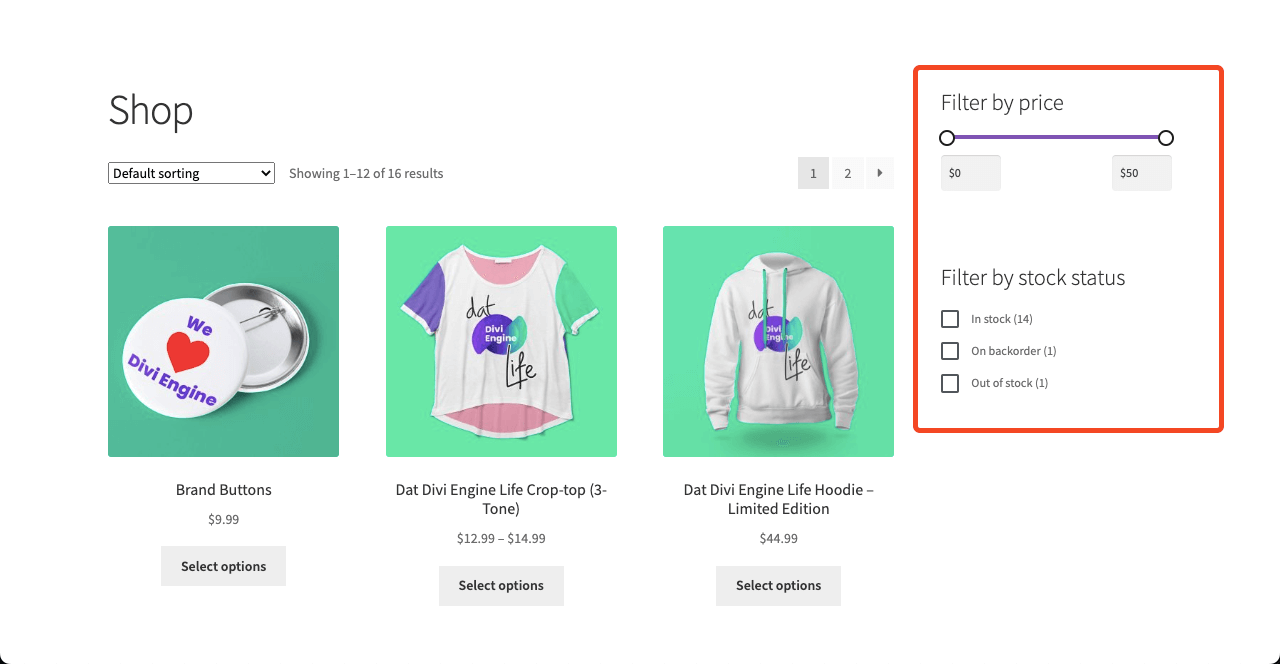
Step 03: Configure this Widget Using the Block Editor
- Now, go to Appearance > Widgets.
- Find the widget you selected just a while ago.
- Hit the plus (+) icon on the widget.
- Add blocks to the widget you want by typing on the search box.

- We have added only two blocks for this tutorial.
- They are Filter by Price and Filter by stock status.
- You can see the preview on the front page.
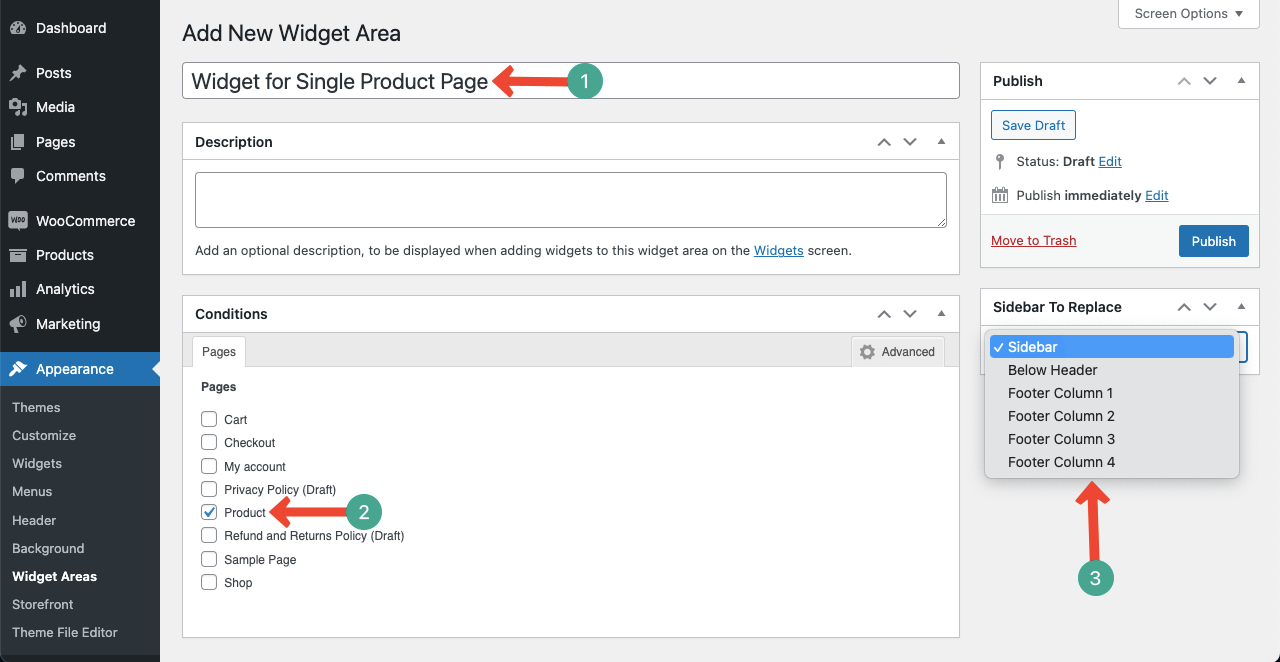
Add a Custom Sidebar to the WooCommerce Single Product Page
This process is the same as before.
- Go to Widget Areas.
- Click on Add New.
- Give a name to the new widget.
- Tick mark Product.
- Select a widget from the Sidebar To Replace section.
- Hit the Publish button at the end.
- Then, go to Appearance > Widgets.
- Find the widget you selected and prepare it.
Thus you can add custom widgets to specific pages.
Final Words!
For optimum results on user experience and conversions, this is a must to add personalized sidebars on individual WooCommerce pages. Hope this article has been helpful enough to guide you. If you have any questions, please write them in the comment box.
Leave a Reply