
Bulk-adding products in WooCommerce can be a time-saving way to populate your online store when you have a large inventory. There are many situations when you may need to bulk-add products in your WooCommerce store.
Such as when you want to migrate your online store to another domain, add temporary batches of products during special occasions, reorganize the store with updated product catalogs from suppliers, and more.
WooCommerce has a straightforward option to bulk products to your store using CSV files. This article will explain how to add products in bulk in WooCommerce using CSV files.
What is a CSV File?
A CSV file stands for a Comma-Separated Values file. It’s a plain text file format used to store and exchange structured data. In the case of WooCommerce, a CSV file contains structured data about products in a tabular format.
Each row on the table represents a product, and the column holds specific details like the product name, type, SKU, price, stock quantity, description, and image URL.
Note: Product types are simple, variable, grouped, and external. SKU is a unique identifying number of the product, used to prevent piracy in branded products.
How to Bulk Add Products in WooCommerce: Step-by-Step Guide
If you have the CSV file of your desired product catalog, you just have to import it to your WooCommerce website. This process is very simple, and you don’t have to use any additional plugins for it. Let’s explore the process.
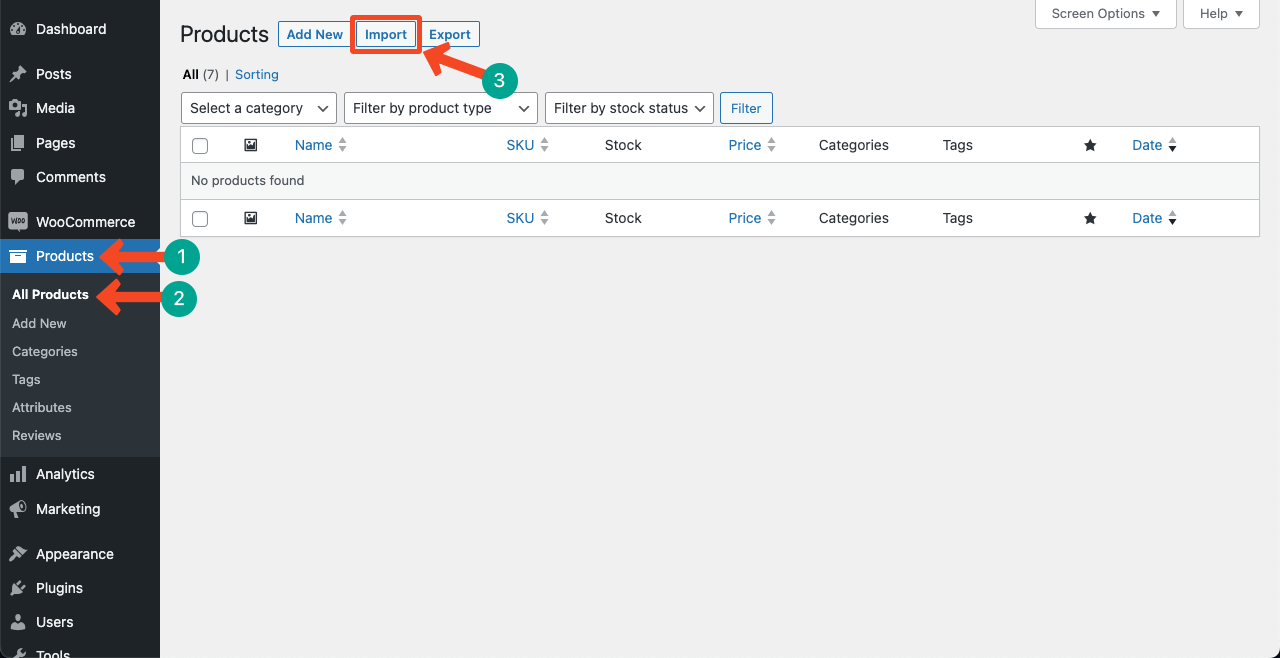
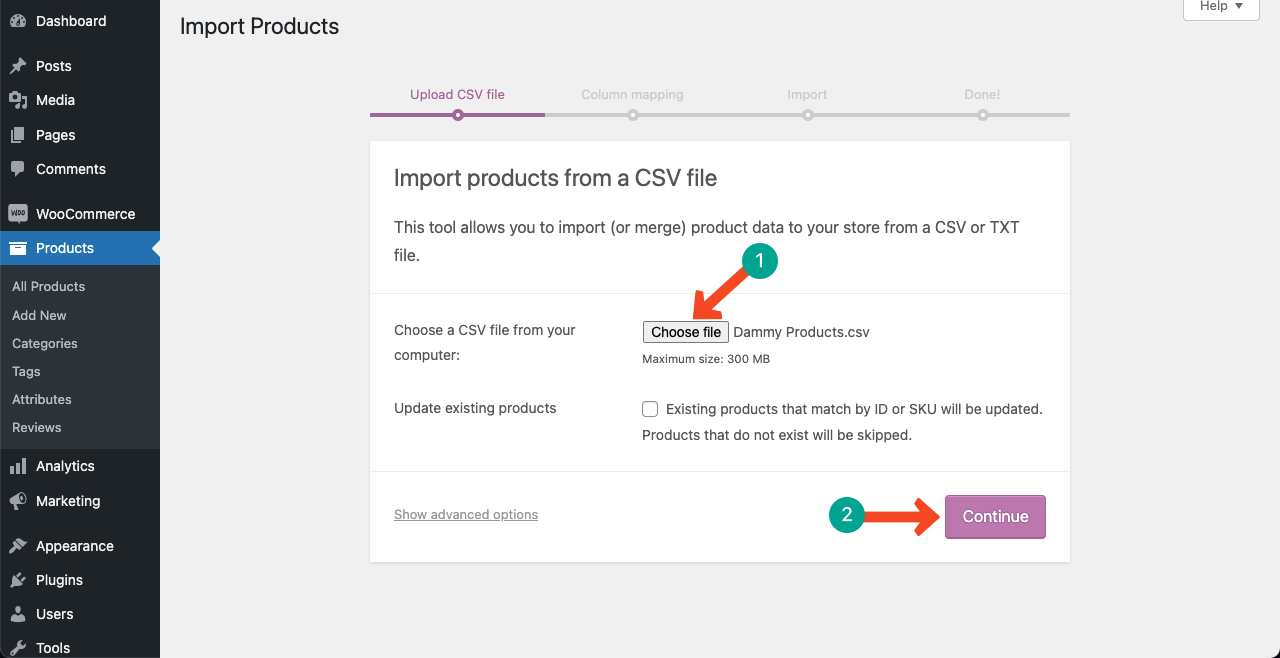
Step 01: Import the CSV File
Log into your WordPress dashboard. Navigate to Products > All Products. Press the Import button.
Click the Choose file option. It allows you to select the CSV file on your local folder or cloud drive. Select the file and then press the Continue button.
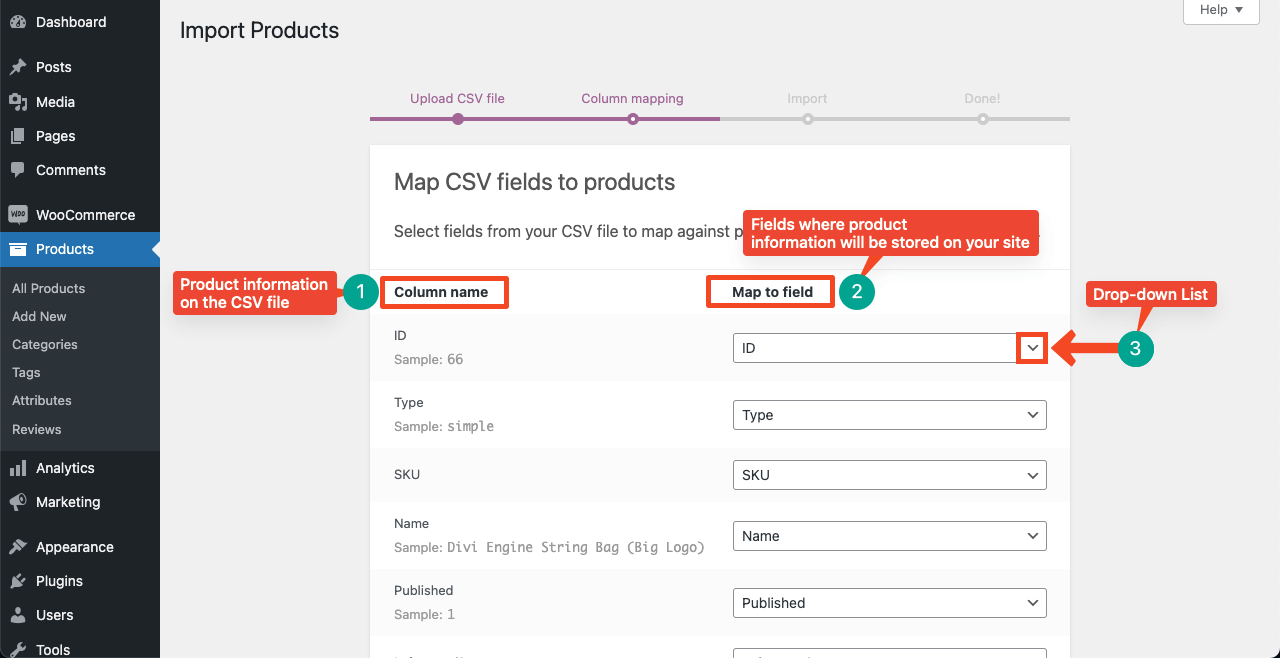
Step 02: Cross-check the Column Mapping
You’ll come on to the column mapping page. This is where you have to make sure imported information is executed currently on the respective fields on your website.
The left Column name section presents your CSV file’s columns and the information they contain. From the Map to field option, you must specify columns where the respective information will be stored and displayed after importing the CSV file.
You may change the field name using the dropdown list on the right side. Select the right fields carefully to display the information coming with your CSV file.
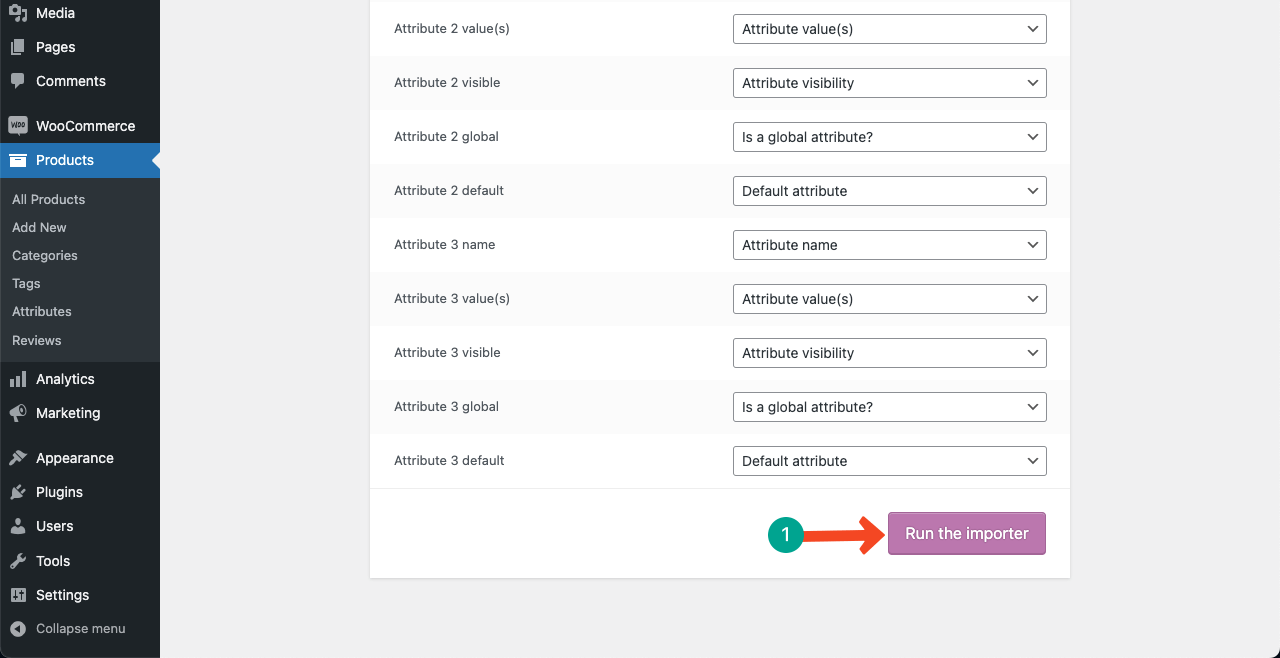
Once you are done, scroll the page down to the end and press the Run the importer button.
Step 03: View the Products
Once the CSV file is imported, you will get the View products button. Click the button.
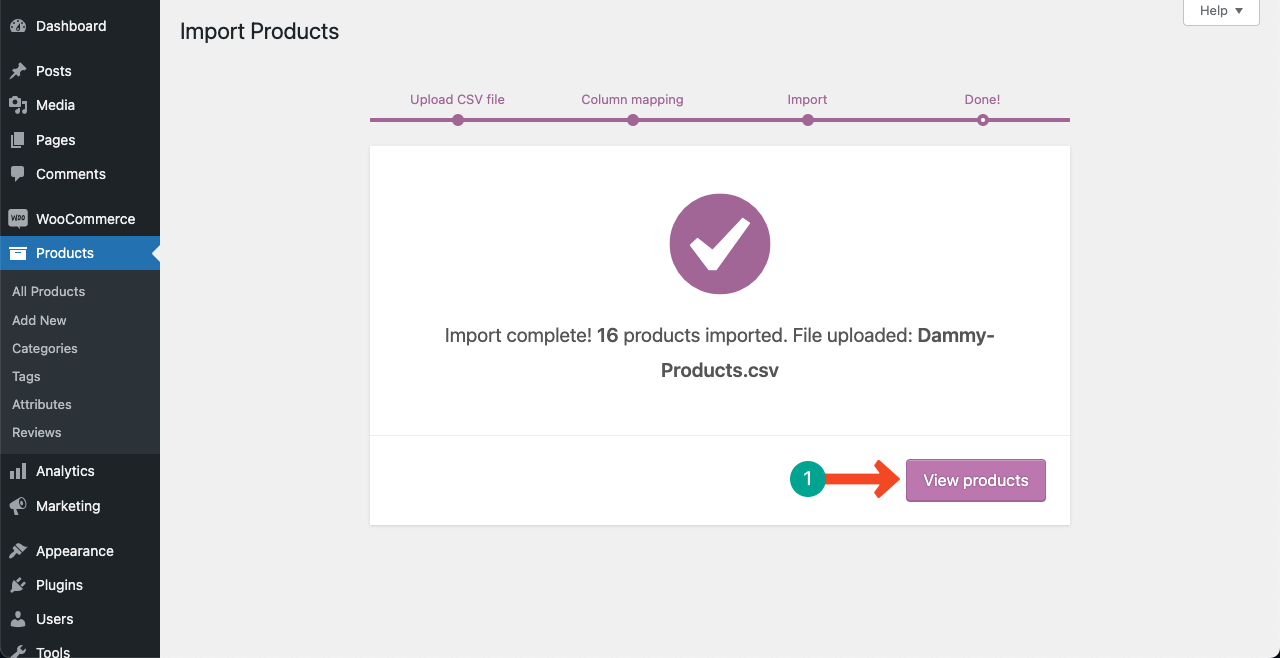
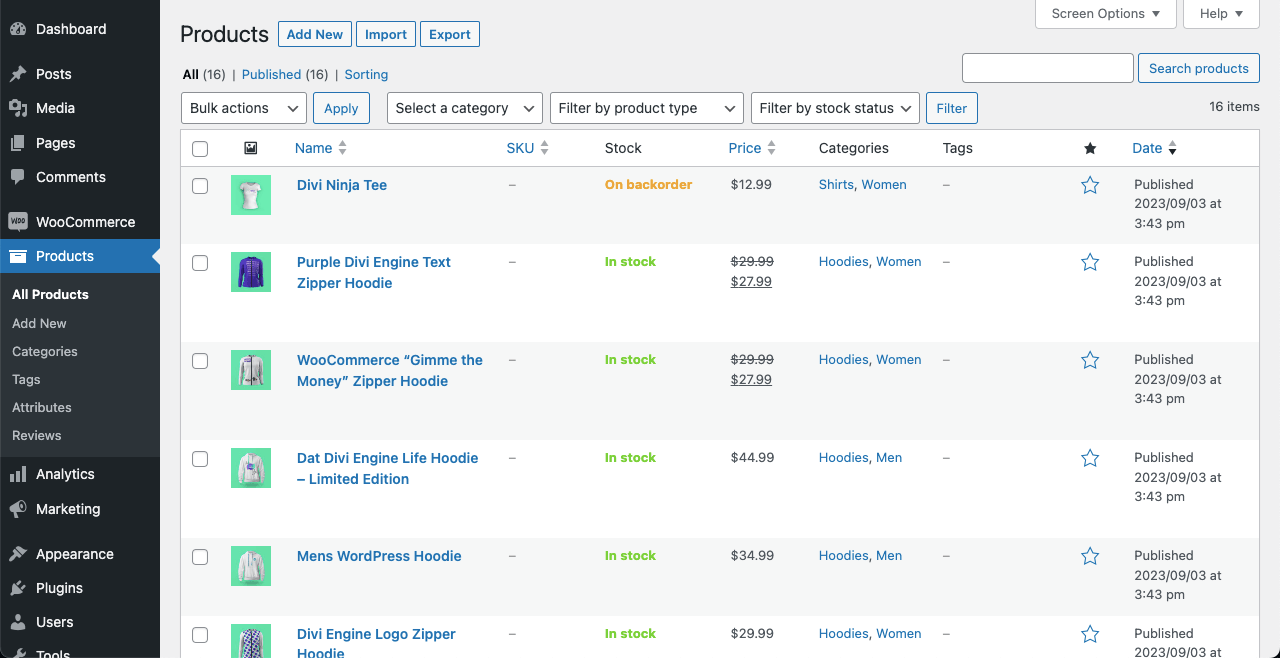
You will be taken to the all-product list. You will find all the products you have imported using the CSV file here. Randomly check some of them to ensure all the information is displayed correctly.
This is how you can bulk add products in WooCommerce without depending on any third-party plugins.
Final Words!
When you have an established online store with considerable regular traffic, you may have to bulk add products on various occasions, depending on the market demand. With the above-explained method, you can do it easily and save a lot of time.
It’s now your turn to apply the method on your website and see the result. If you face any problem in the midway, let us know through the comment section.
Leave a Reply