Cache makes your loading speed faster. But sometimes, you cannot see your changes in the website due to outdated cache files. Clearing the WordPress Cache solves this problem.
In this post, I will show you how to clear cache in WordPress. After reading the post, you will be able to clear the cache in WordPress site of yours.
Let’s start.
The cache is a small data that is saved on your disk for faster communication. For example, whenever you visit a website, the browser will download static content, and then it will be stored as cache files in your storage. Next time whenever you load the same site, it will be faster than the first time due to cache files. But sometimes, due to cache, the browser doesn’t load the latest data. Therefore we have to clear the cache.
The most common way to leverage web cache is by using WordPress cache plugins. Therefore I will show you how to clear cache using WordPress caching plugins. You can use any of the below plugins, but make sure you have installed and activated them.
Clear Cache Using WP Super Cache
WP Super Cache is one of the most used and popular WordPress caching plugins. It comes with a wide range of caching features, including automatic cache compression and cache scheduler.
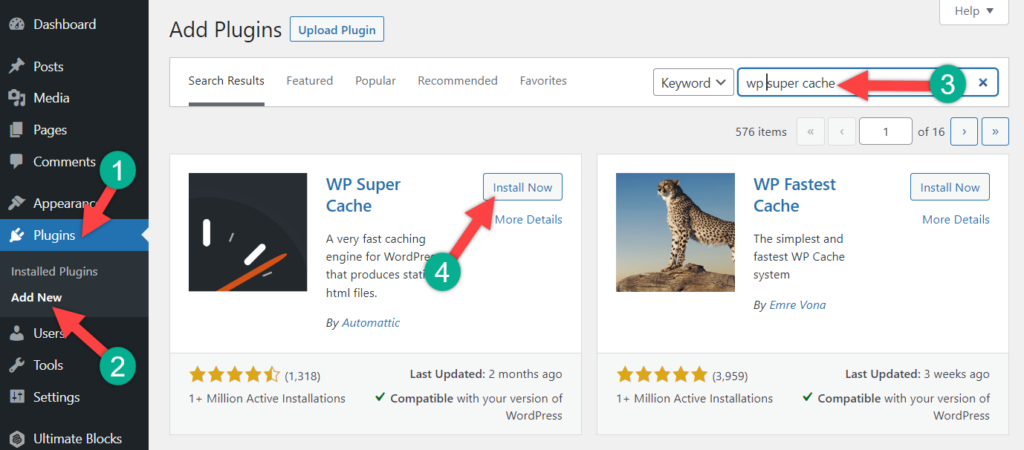
Step 1: Install WP Super Cache
Navigate to Plugins -> Add new and search for ‘wp super cache’. Install the plugin, and don’t forget to activate it.
Step 2: Clear Cache
To clear cache files with this plugin,
First, navigate to Settings -> WP Super Cache from your dashboard. Now click on the Delete Cache button located under the Delete Cached Pages section.
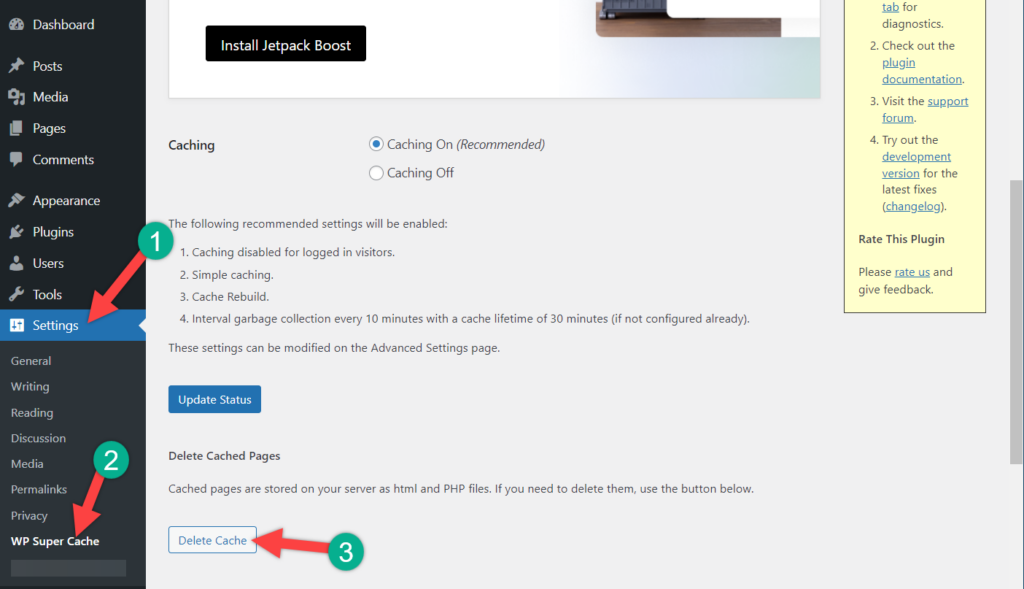
Your cache will now be deleted.
Clear Cache Using WP Fastest Cache
WP Fastest Cache is another popular caching plugin widely known for its intuitive dashboard and useful features.
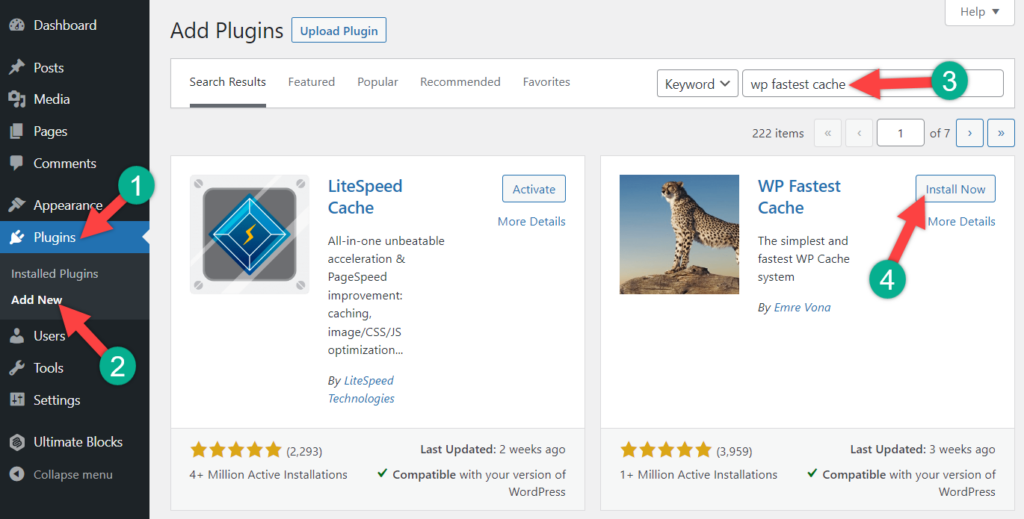
Step 1: Install WP Fastest Cache
Navigate to Plugins -> Add new and search for ‘wp super cache’. Install the plugin, and don’t forget to activate it.
Step 2: Delete Cache
When you create a new post or page, the plugin automatically deletes all cache files. But if you want to delete the cache manually.
First, navigate to WP Fastest Cache and click on ‘Delete Cache’ tab. Now select the Delete Cache tab.
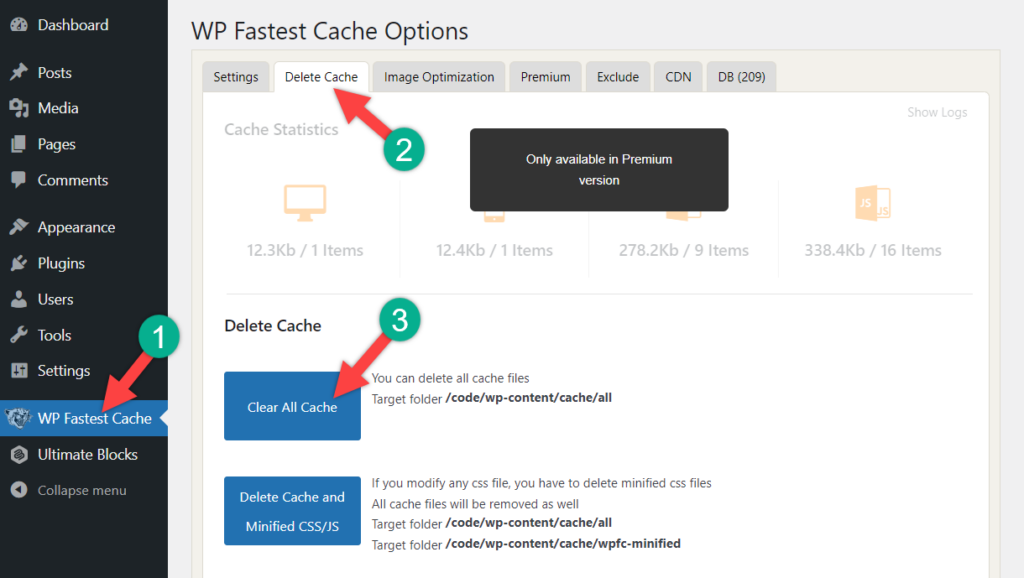
Now click on the Clear All Cache button, and your cache will be deleted.
Clear Cache Using W3 Total Cache
W3 Total Cache is known for its bandwidth-saving features and customization.
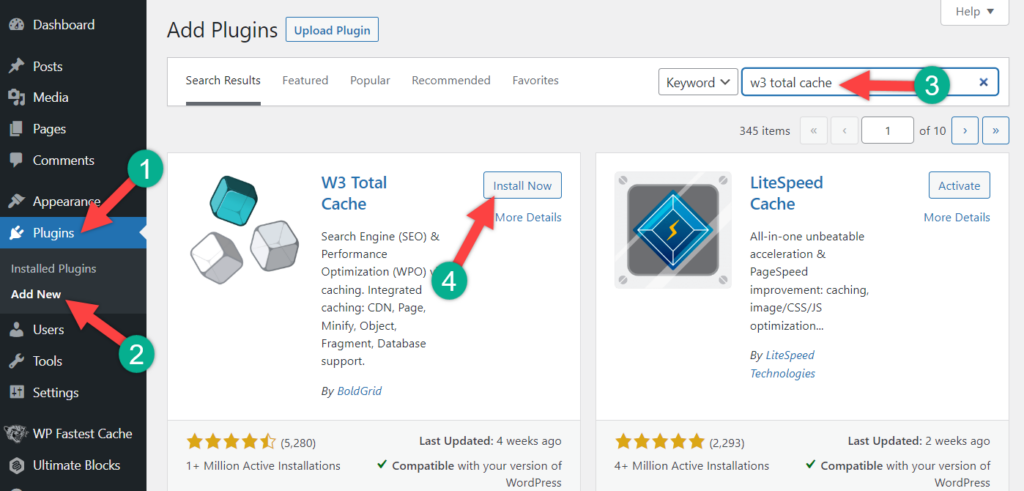
Step 1: Install W3 Total Cache
Navigate to Plugins -> Add new and search for ‘W3 Total Cache’. Install the plugin, and don’t forget to activate it.
Step 2: Clear Cache
Before clearing the cache, you need to complete the setup guide. Then Navigate to Performace -> General Settings. Now click on the empty all caches button.
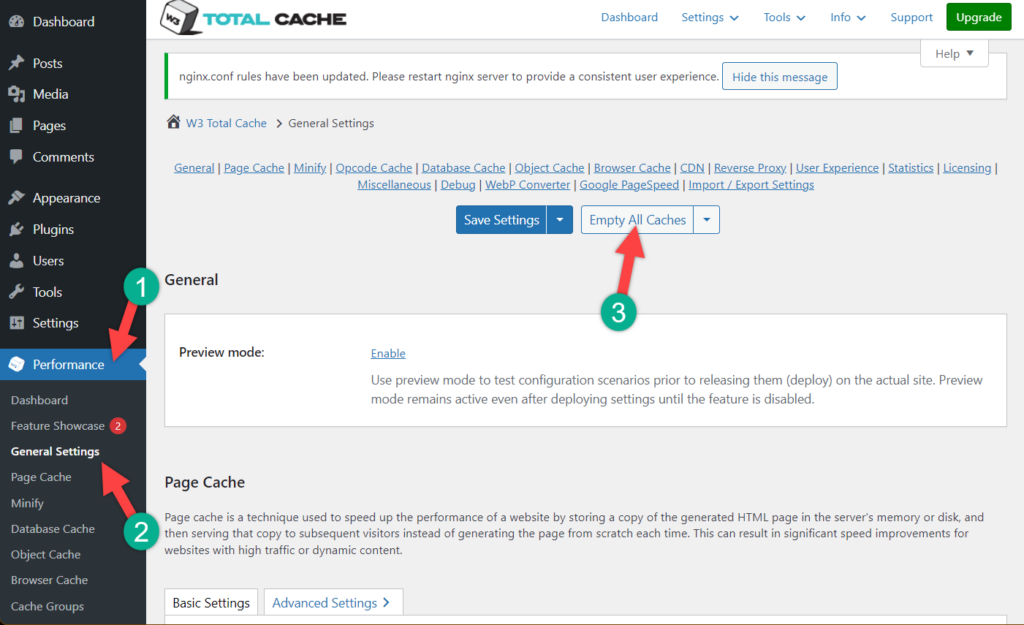
And your cache will be deleted.
Last Words
There are also other caching plugins available in the WordPress directory. You may use any of those; all you have to do is find the Delete Cache button and click it. Next, all your site caches will be deleted automatically. If you find any difficulties, ask me, as I will be there to help you.
If you liked the post, feel free to share it with your friends.
Leave a Reply