
It’s frustrating when you are about to upload a file in WordPress but it shows that your file exceeds the maximum upload size.
If you’re facing this issue and looking for a solution, you’re in the right place.
Here I’ll be sharing how to increase the maximum upload file size in WordPress. Before diving into the tutorial, let’s check about the maximum upload size in WordPress.
What’s the Maximum Upload File Size in WordPress?
When you upload a big file, your WordPress server uses a lot of resources. But it’s important to prevent your website from frequent server timeouts. So, the hosting provider limits the upload size between 4 MB to 128 MB at the server level.
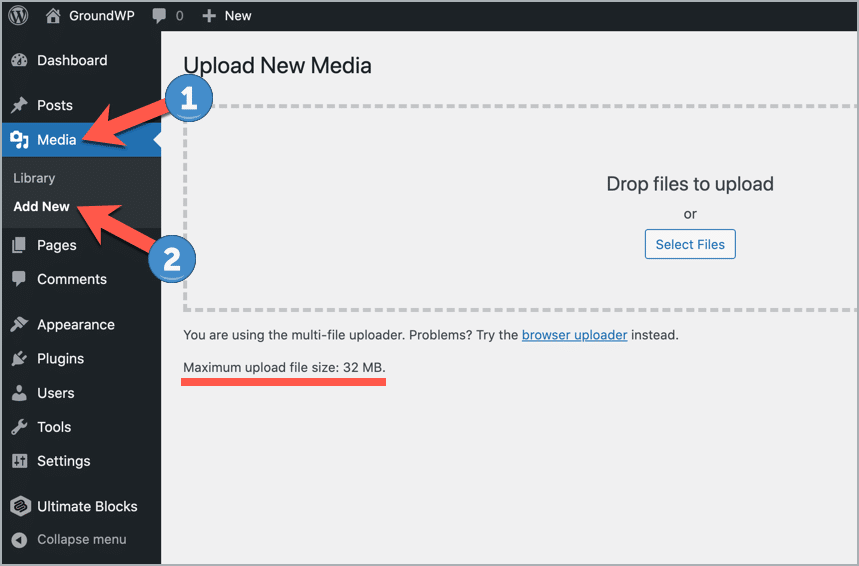
How to Check the Current Maximum Upload Size in WordPress
To check the current maximum upload size in WordPress, go to WordPress Dashboard > Media > Add New and you’ll see the maximum upload size.
Now let’s see how to increase the maximum upload file size.
Increasing the Maximum Upload File Size in WordPress
There are several ways you can use to increase upload file size. As the default configuration set by the hosting service, some of these ways may not work for you.
Let’s start with the first option.
1. Contact Your Hosting Provider
Contacting your hosting provider is the fastest and safest option. Just contact the tech support team and ask them to increase your upload limit. Use the live chat option to get instant support.

Increasing the file upload limit is an easy task for the tech team. So most web hosting companies can help you to fix this.
We recommend you do this first as it doesn’t require any file editing or plugin installation.
2. Using A WordPress Plugin
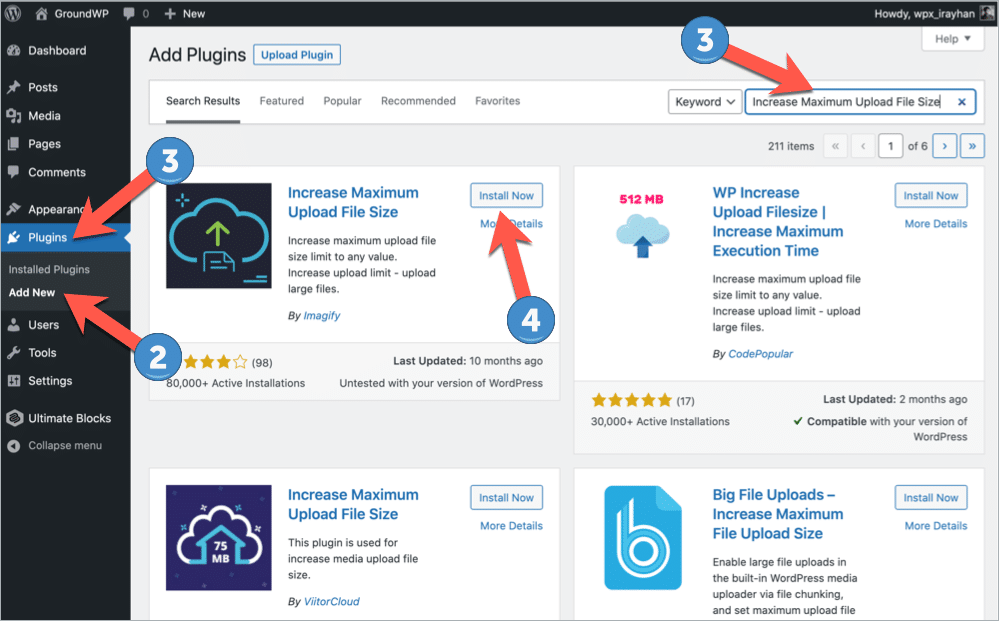
There are a few WordPress plugins that can help you to increase the maximum upload file size. Here we will be using the Increase Maximum Upload File Size plugin by Imagify.
To install the plugin, go to WordPress Dashboard > Plugins > Add New and search for ‘Increase Maximum Upload File Size’. Then install and activate the plugin by Imagify.
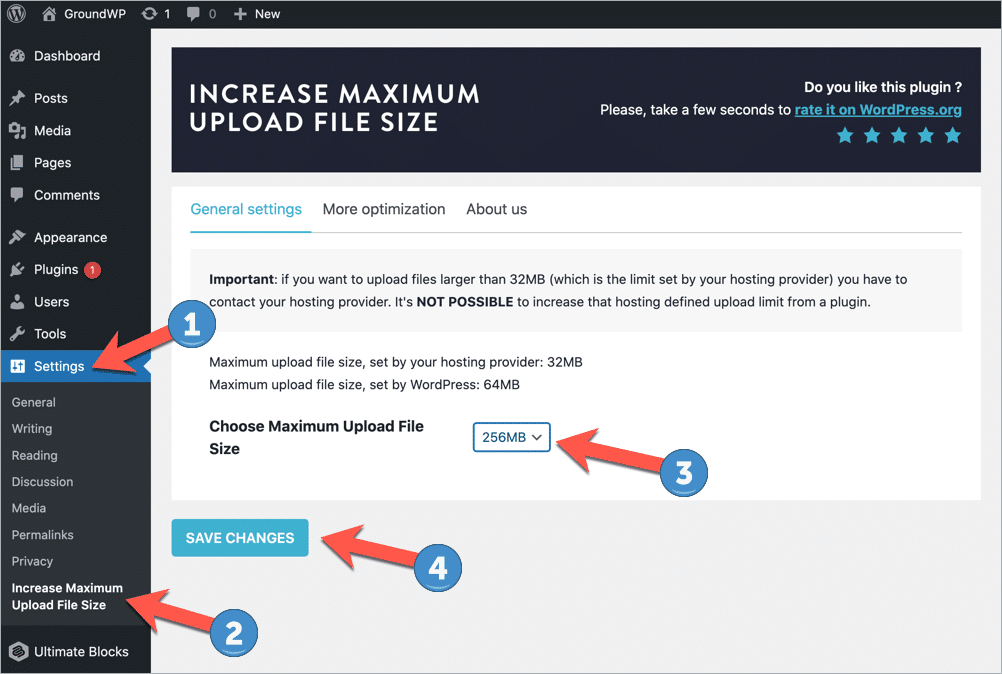
After activating the plugin, go to Settings > Increase Maximum Upload File Size and choose the maximum file size. Then click on the ‘Save Changes’ button.
This method won’t work if your hosting provider defined the limit.
3. Using .htaccess file
This method is for the readers whose web server runs on Apache. You can edit and update your .htaccess file in order to Increase the maximum limit.
First, you need to edit the .htaccess file. For this, you should access your server using cPanel or FTP.
Now search for the .htaccess file inside the root folder. To make things clear, it’s the folder that has wp-config.php inside it.
Note: You need to download a copy of the file to your local computer before making any modifications so that you have a secure backup in the event something goes wrong.
After you finish backing up your website, add the following code to the .htaccess file.
php_value upload_max_filesize 256M
php_value post_max_size 64M
php_value memory_limit 128M
php_value max_execution_time 300
php_value max_input_time 300
There are three PHP directives that are responsible for how PHP handles uploads, according to the PHP manual:
- upload_max_filesize: maximum upload limit for files.
- post_max_size: maximum upload limit that will be handled in a POST request.
- memory_limit: the memory which is allocated for PHP.
Every value uses M rather than MB. PHP is handling its guidelines in such way.
4. Editing functions.php File
If the above method doesn’t work for you, we recommend following this method.
You need to add the following code snippet at the bottom of your funtions.php file.
@ini_set( ‘upload_max_size’ , ’256MB’ );
@ini_set( ‘post_max_size’, ’256MB’);
@ini_set( ‘memory_limit’, ’30MB’ );
Conclusion
So these are the ways you can use to increase your WordPress site’s maximum upload size limit.
We hope this post helped you to increase the limit. If you’ve found this post helpful, consider sharing this on your social accounts.
Leave a Reply