
Although WordPress is an easy-to-use content management system for creating, it often fails to provide optimum control over the appearance and layout of a website. Respective HTML files can help you overcome this limitation and incorporate unique features, styles, and layouts.
This is why it’s important for WordPress developers to know how to upload HTML files to WordPress. Though it may seem hard initially, it’s not that difficult. This article will cover easy guides on how to upload an HTML file to WordPress.
Before that, let’s briefly discuss what HTML files are.
What is an HTML File?
HTML files are Hypertext Markup Language files used for creating and structuring website content. They help define the layout, structure, and elements of web pages. These files are written in plain text containing codes and tags for dictating how web content should be displayed on browsers.
HTML files may also include CSS and JavaScript codes further to enhance a website’s visual appearance and functionalities.
How to Upload an HTML File to WordPress
There are several methods of uploading HTML files to WordPress. Take a look at some of them from the below discussion and select the one that suits you.
Method 01: Upload HTML Files from cPanel
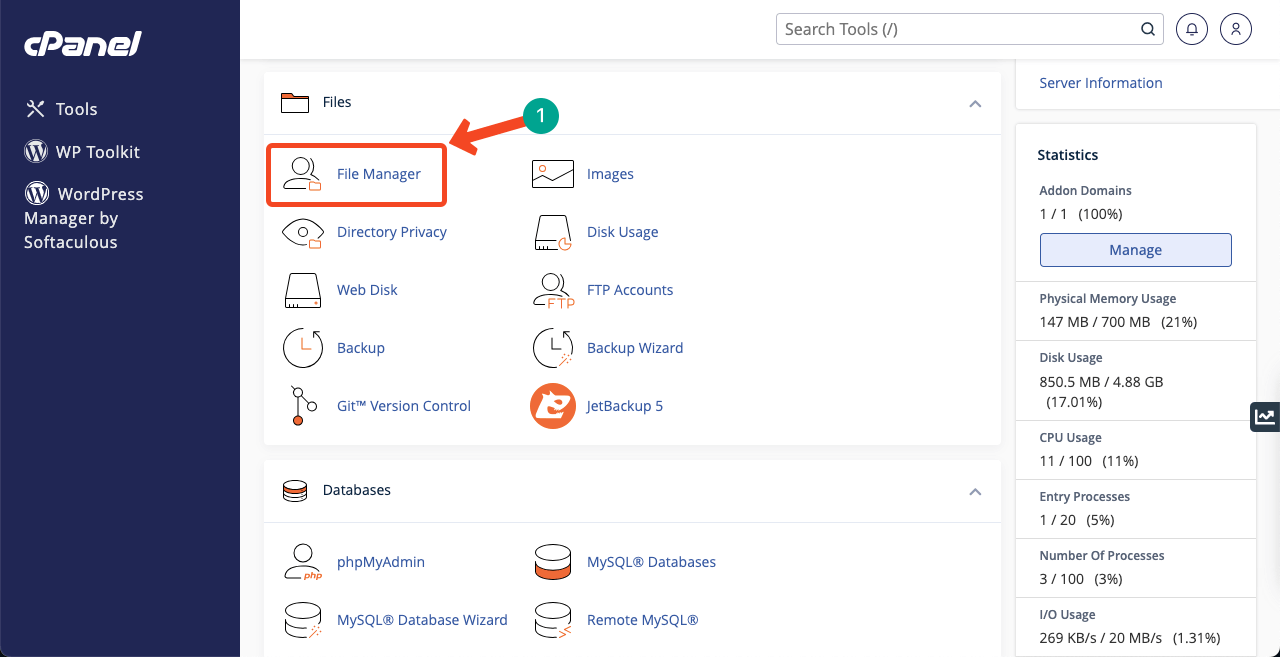
Log into your cPanel using the credential provided by your hosting provider. Locate File Manager and click on it.
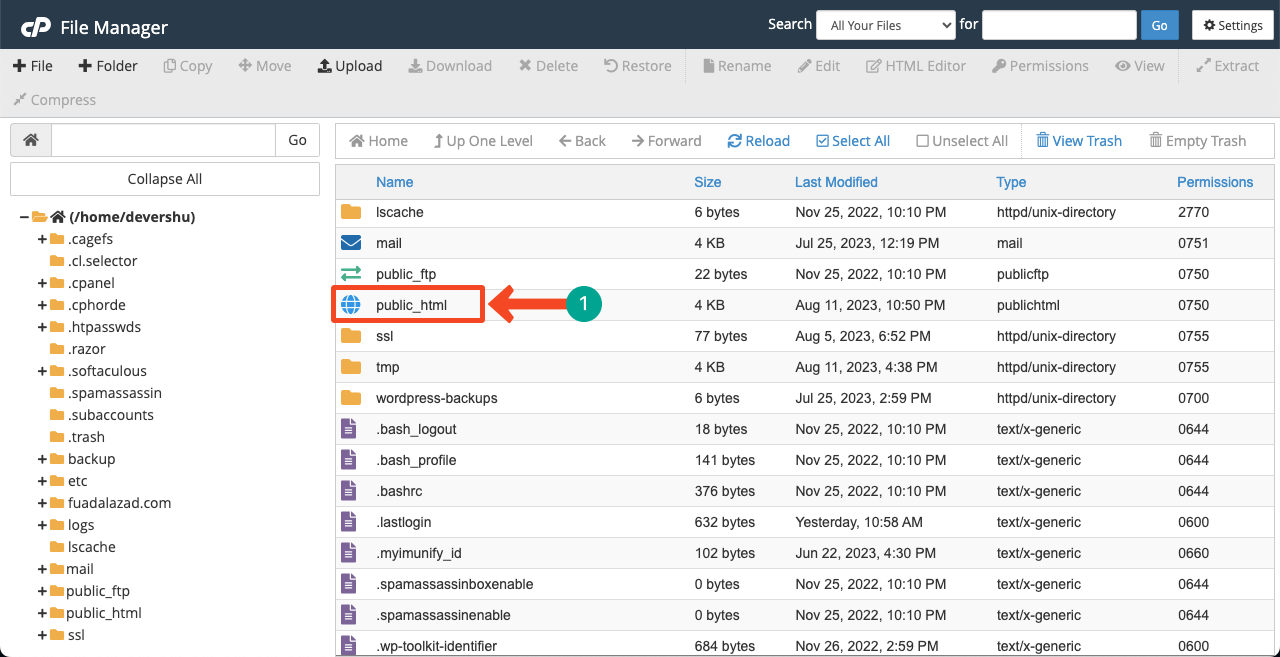
Find public_html on the list and double-click on it.
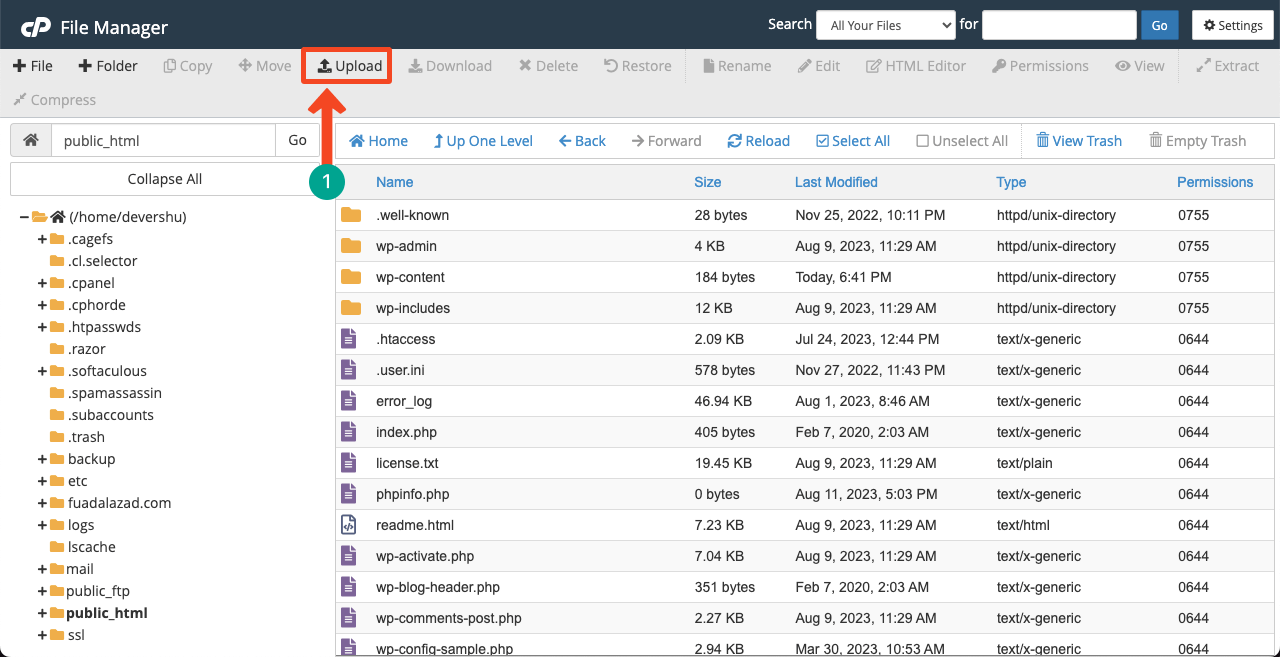
Press the Upload button on the bar. It will take you to a new page where you’ll get an option to upload HTML files.
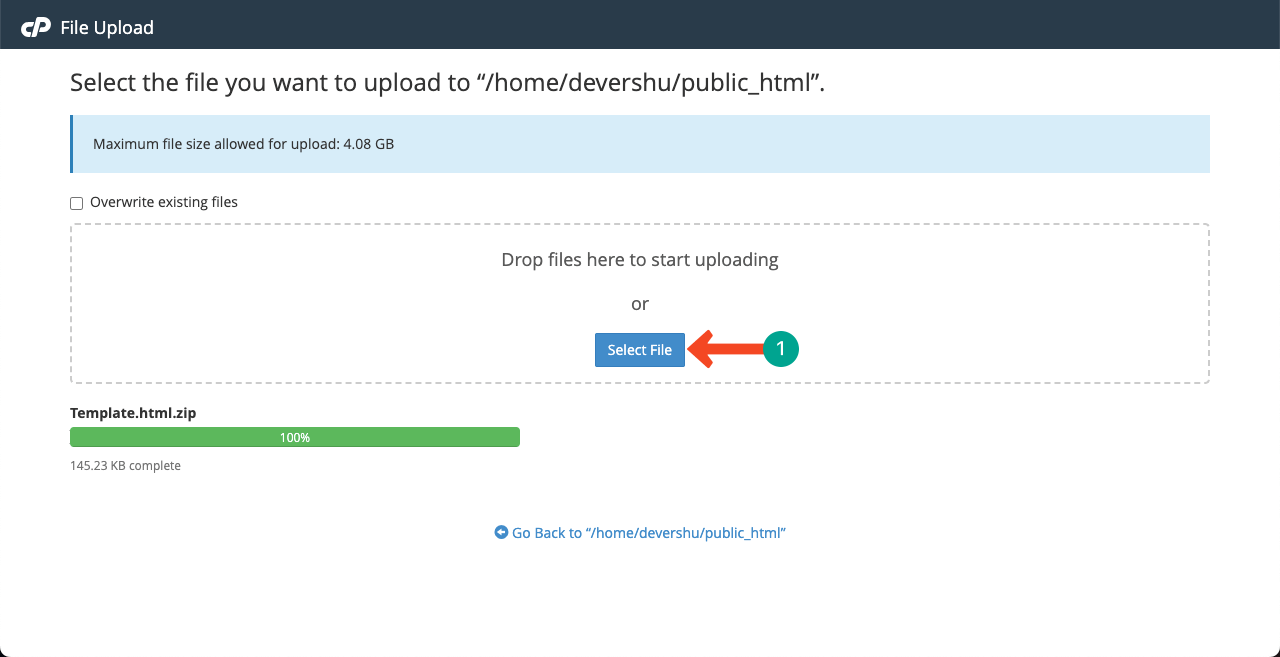
Click the Select File button to upload the HTML file from the backend.
Note: Make sure you have zipped the file. Otherwise, it may cause some trouble.
Come to the public_html file list. Restore the page. Then, you will find the uploaded HTML file on the list.
Next, you need to extract the zip file. Right-click on it. Click the Extract option. It will extract the main file on the list. You can delete the zip file after that.
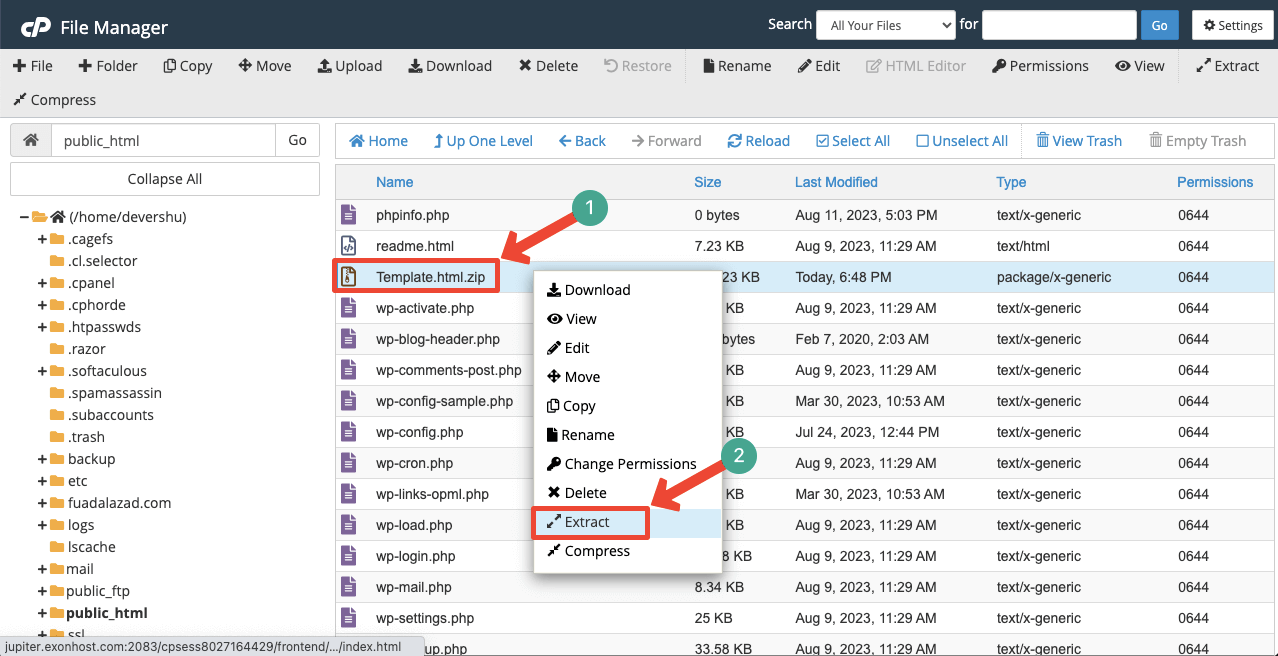
Thus, you can upload HTML files to your WordPress site from the cPanel.
Method 02: Upload HTML Files to the Media File Section
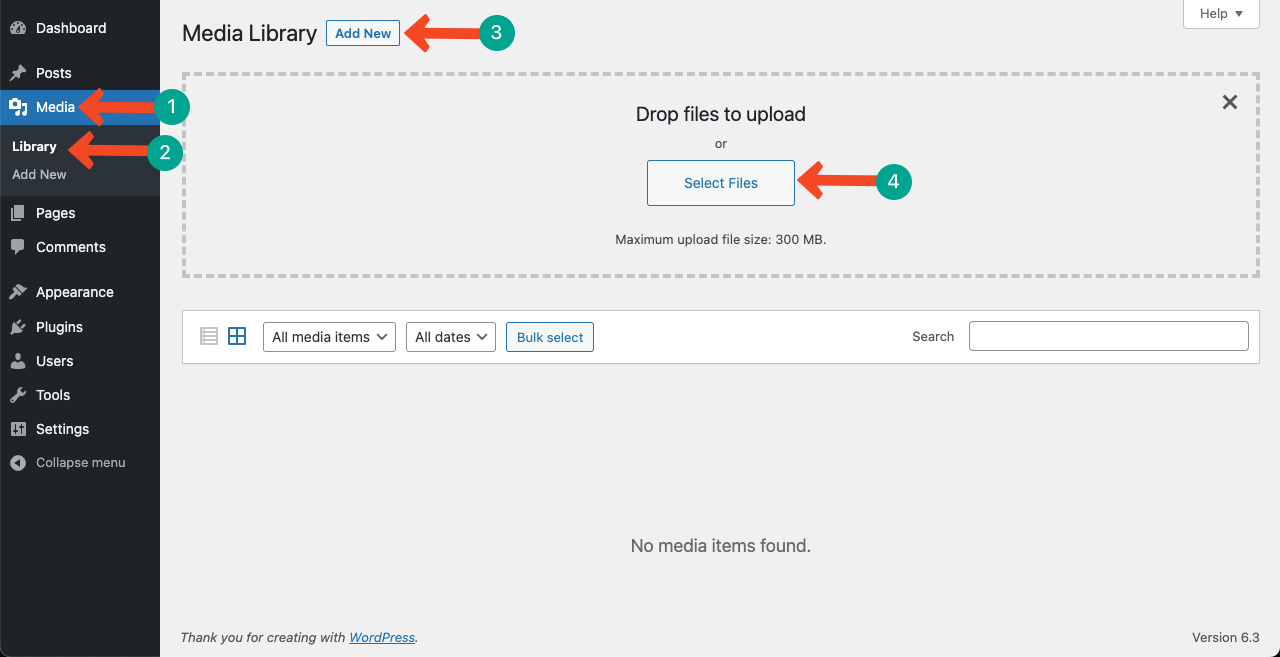
You can upload and save HTML files to the media file section and use them later on when you wish. Navigate to WP Dashboard > Media > Library.
Click the Add New button. It will open up a new option named Select Files. You can upload your desired HTML file from the local drive by clicking it.
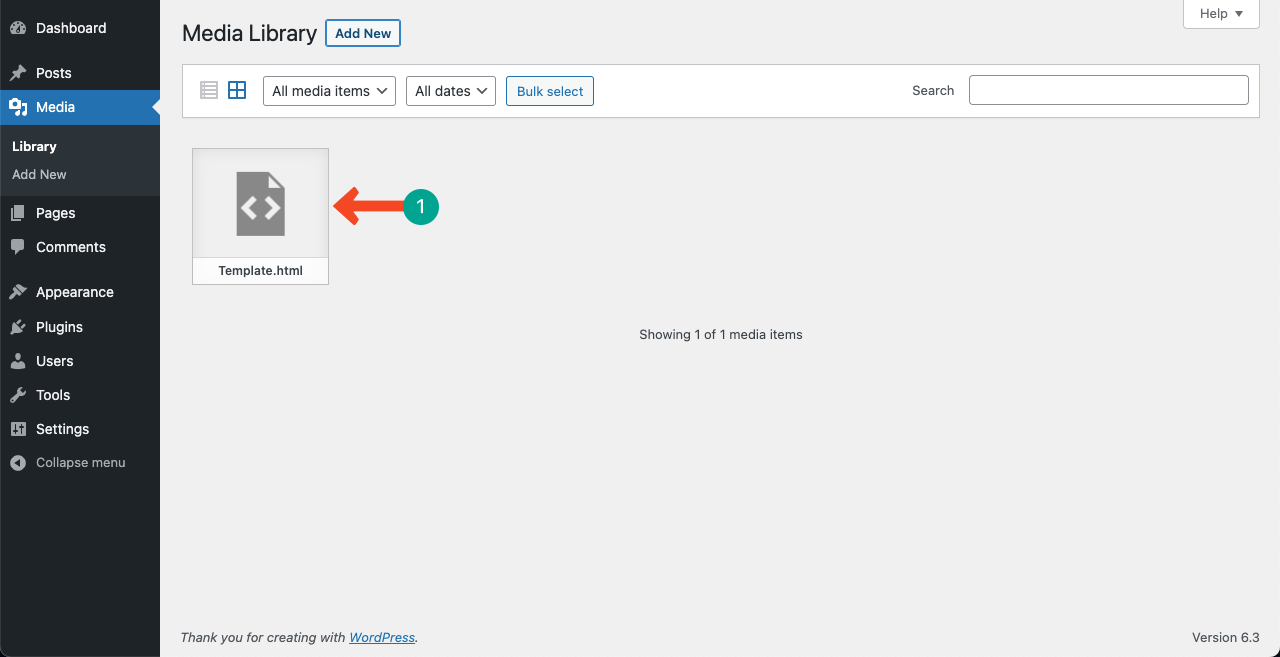
You can see in the image below our HTML file has been saved in the Media section.
Note: You don’t need to convert the file into Zip format while uploading it to the Media section.
Conclusion
Hope you have learned an important chapter from this article. We have explained how to upload an HTML file to WordPress. Once the file is uploaded, you must check if all the functions, links, and elements work perfectly.
Verify if the HTML file is compatible with the WordPress environment and doesn’t create any conflict with the existing themes, plugins, and functionalities. We will discuss these issues in detail in a later article. Stay tuned with us.
Leave a Reply