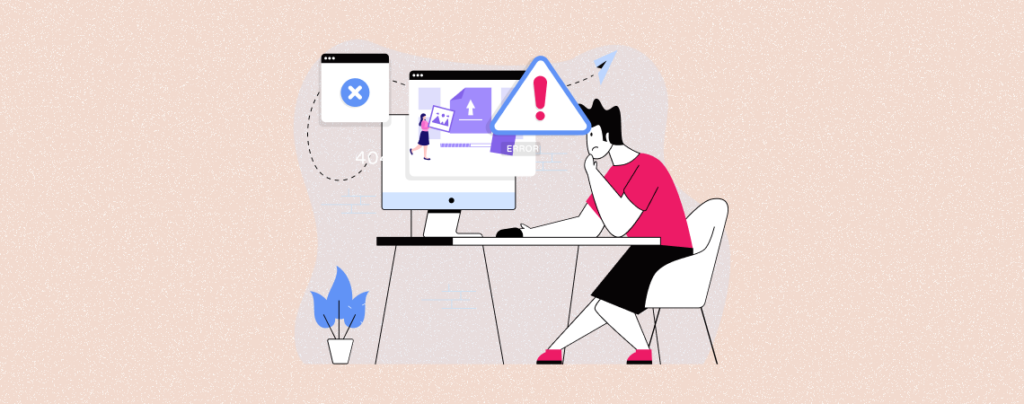
WordPress is really an intuitive content management system for creating and managing websites. Still, you may face some troubles while operating this CMS. For example, HTTP error when uploading images to WordPress.
And if you ever face this, remember that you are not the only one facing this problem. This error may prevent you from adding new images to your site and disrupt the workplace. There may be numerous reasons behind this problem.
In this guide, we’ll explain all the possible ways how to fix HTTP error when uploading images to WordPress.
What is the WordPress HTTP Error?
HTTP error is a common error in WordPress that happens when people try to upload, update, and edit media files on their websites. This type of error may present itself with HTTP status codes like 404 not found, 403 forbidden, 500 internal server errors, etc.
Many factors can contribute to the occurrence of these errors. Server configuration problems, limitations on file sizes, conflicts within themes and plugins, and insufficient memory or server resources are some most common of them.
How to Fix HTTP Error When Uploading Images to WordPress
There is no one-line solution to this problem. You must try out a series of steps one by one till you figure out the main conflict behind the problem. Only then the problem will be fixed. Let’s follow the steps with us.
Step 01: Check the Internet Connection and Refresh the Page
A slow internet connection can lead you to the problem, interrupting the uploading process. Make sure you have a stable internet connection.
Plus, your web pages may often face temporary bugs caused by the hosting server. A hard refresh can clear the browser. Then, log into your website again.
Go to step two if this method doesn’t work.
Step 02: Optimize Your Image Before Uploading
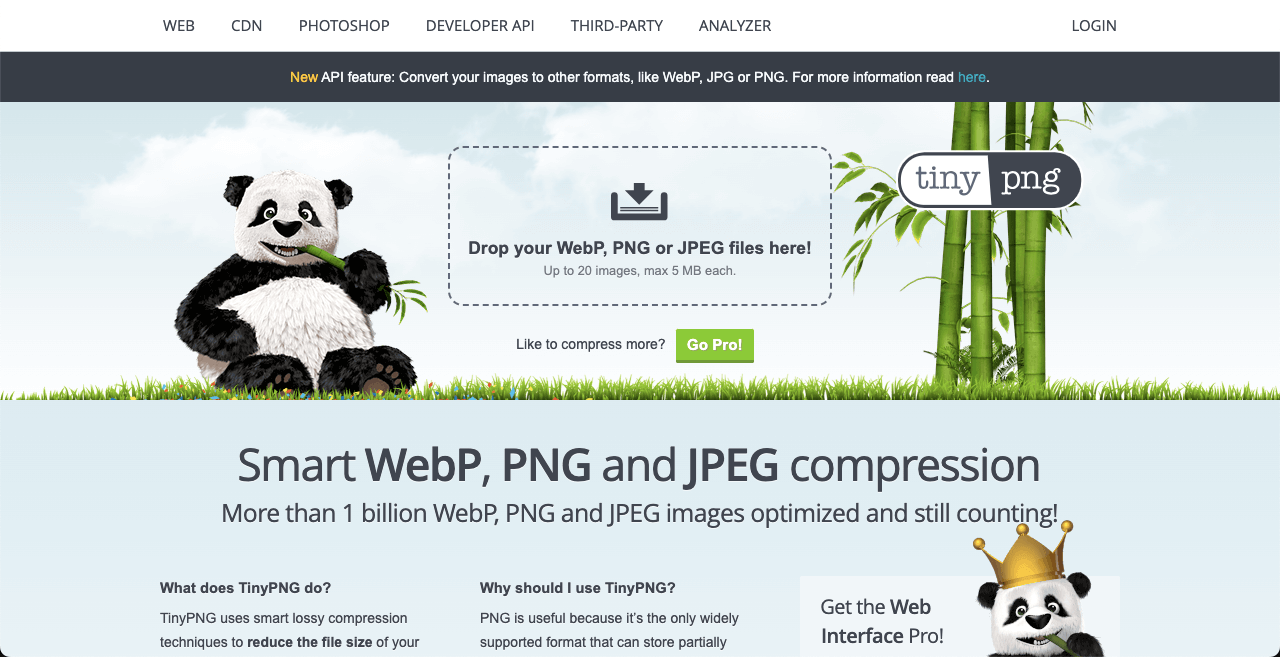
If your images are excessively large sized, you may fail to upload them. Better if you optimize them before uploading. TinyPNG.com and TinyJPG.com are two free and great platforms for reducing image sizes without affecting their quality.
Some people may suggest you use any image optimization plugin to optimize images in bulk quantity. But we recommend you not to do that. Because if you optimize images using plugins, it will still consume your valuable web space.
Optimizing images before uploading them can save your web disk space.
Step 03: Rename the Image File
Using the same words and names consecutively for multiple images can cause problems. You can’t use the same for more than one image consecutively. You must bring variations in the character even if you reupload the same image multiple times.
Characters like @, !, #, %, * can cause the problem. Also, avoid using exactly the same names of the files in the File Manager.
Step 04: Disable All the Themes and Plugins to Avoid Conflict
If there is any conflicting theme or plugin installed on your site, it may cause a problem. Besides, there are some plugins and themes that aren’t compatible with others. To find out this faulty element, disable all the themes and plugins.
Then, start activating each of them one by one. In the meantime, check if image uploading has started working or not. Whenever you come across a theme or plugin that has problems with image uploading, mark this as the conflicting one.
In such cases, contact the support of that theme or plugin.
Step 05: Increase the PHP Memory Limit
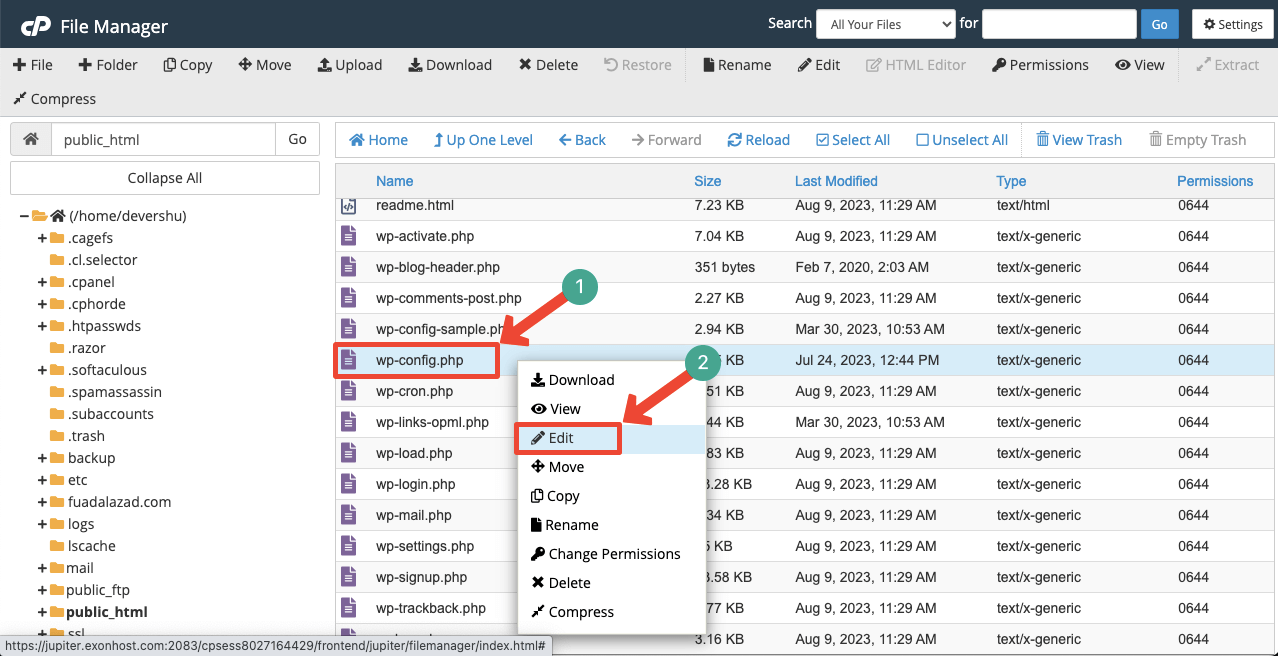
Log into your cPanel. Locate File Manager. Click and open it.
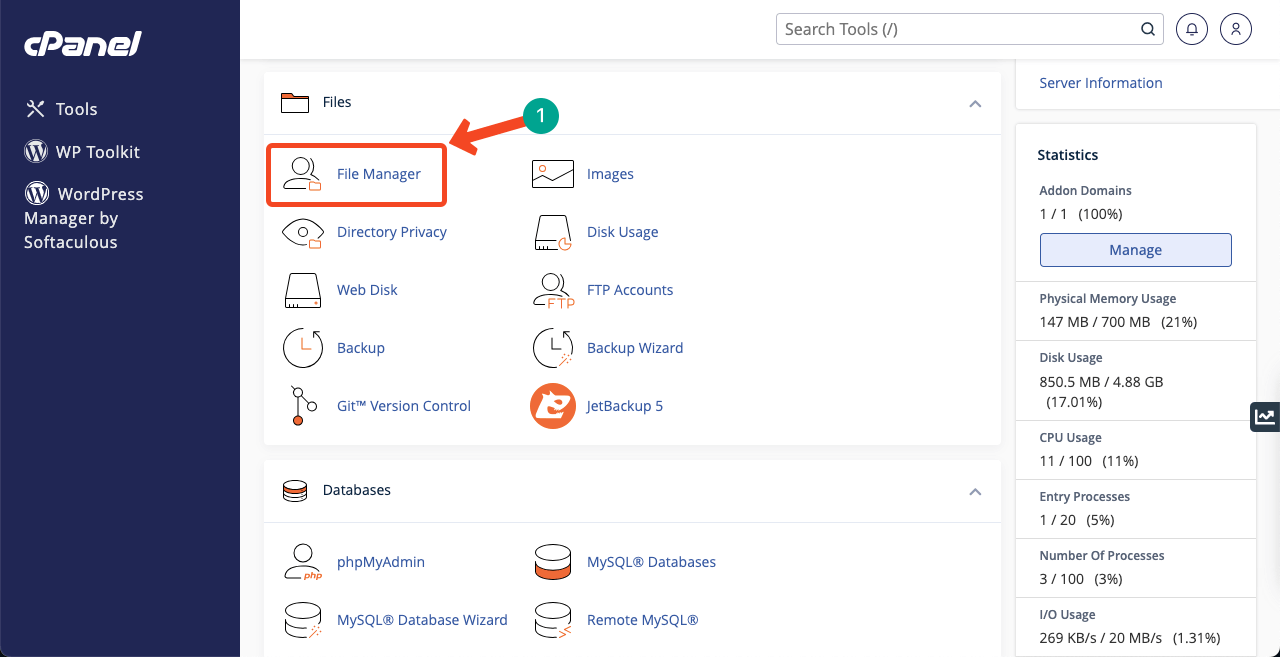
Find the wp-config.php file. Right-click on the file and hit the Edit option on it. This will take you to a new page.
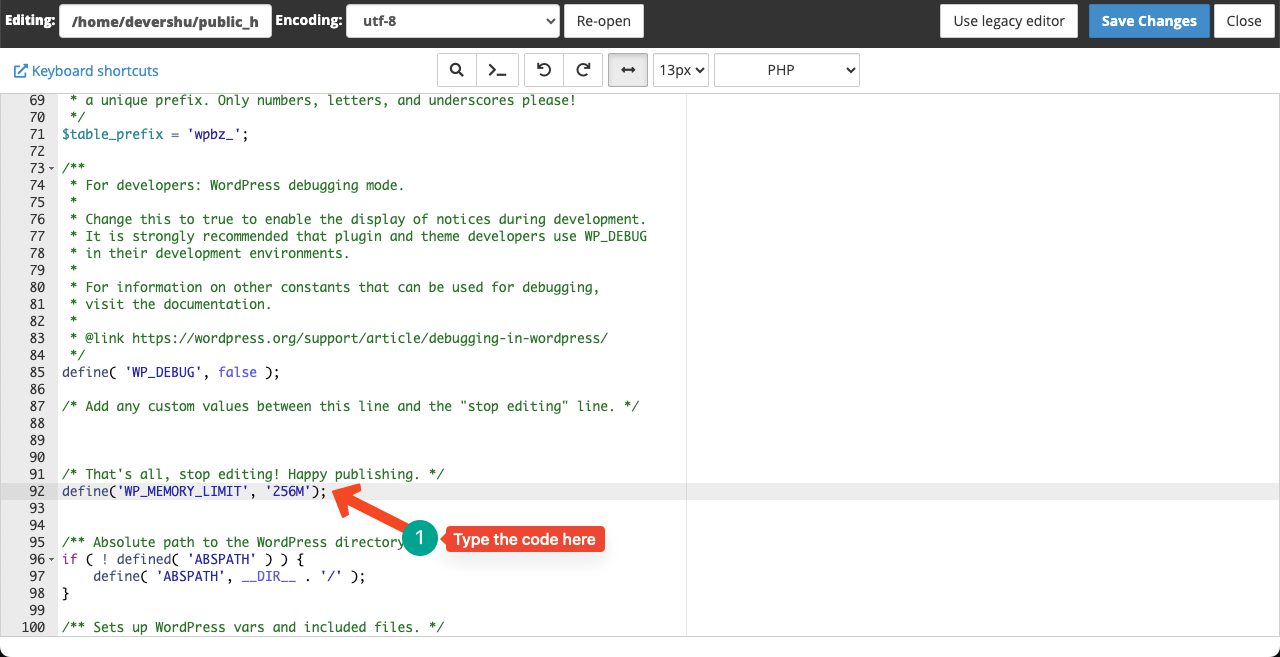
Come to the section by scrolling pointed out in the image. Type the below code there, as you can see in the image.
define(‘WP_MEMORY_LIMIT’, ‘256M’);
Hit the Save Changes button at the end.
Hope your problem is solved. If you still face the problem, try out step six.
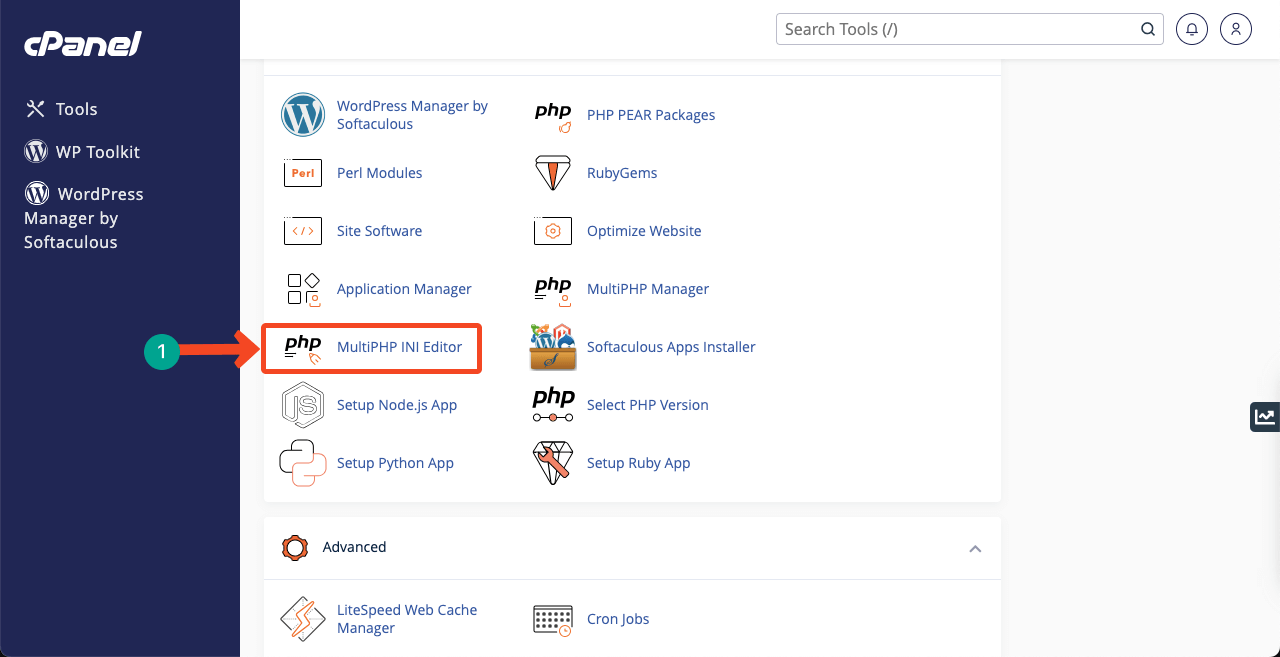
Step 06: Increase Maximum Upload File Size
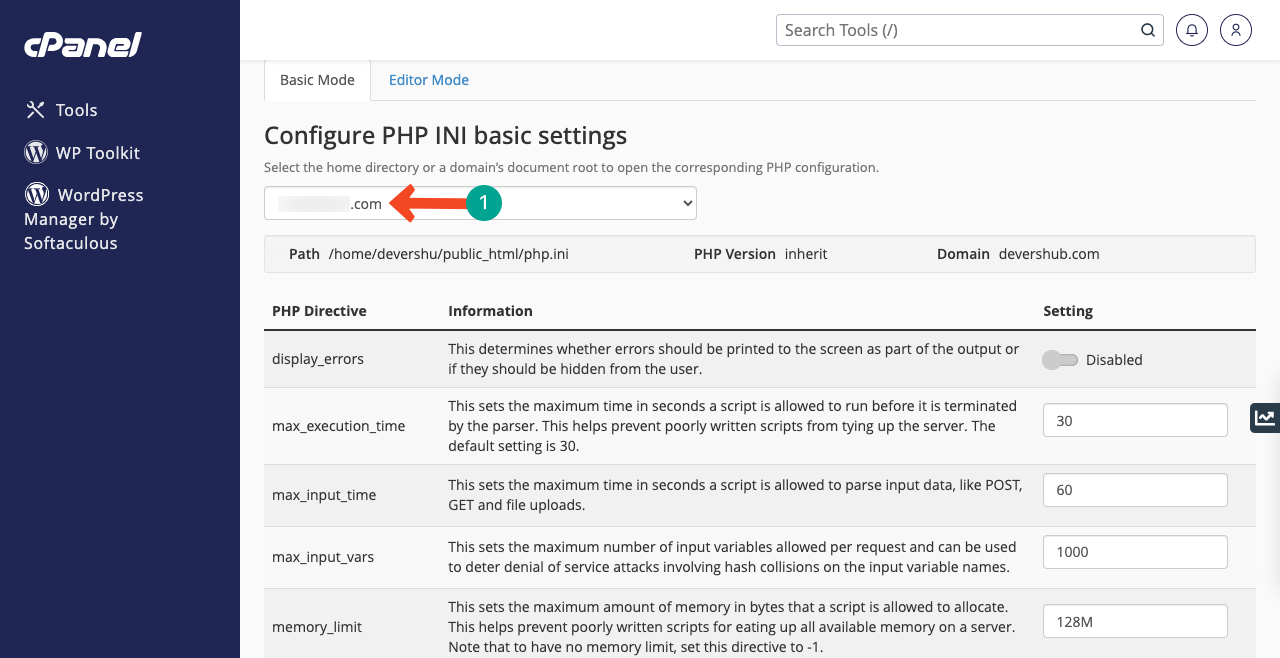
Go to your cPanel again. Locate the option MultiPHP INI Editor. Click on it.

If you have hosted multiple domains, select your desired domain from here.
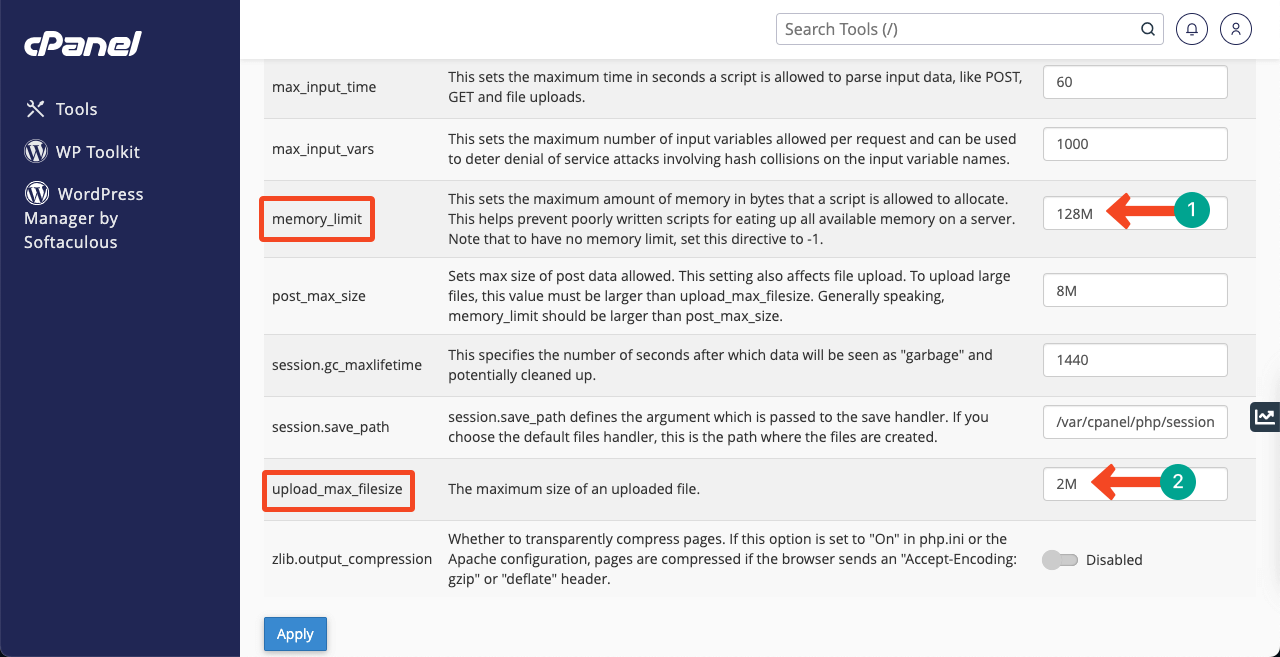
Set values on the respective boxes memory_limit and upload_max_filesize. Hit the Apply button at the end.
Hope this will solve the problem. If not, try step seven.
Read: How to Increase the Maximum Upload Size in WordPress
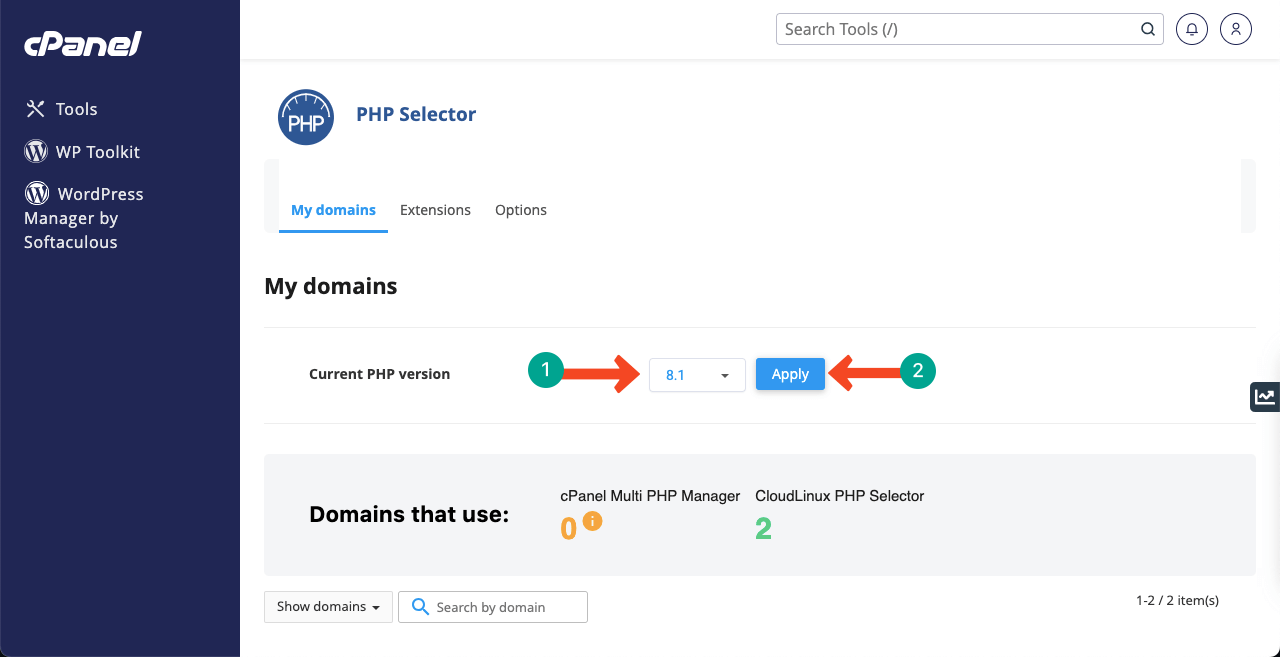
Step 07: Update the Latest PHP Version
Your problem is supposed to be solved by now. If not, using the old PHP version may be a key problem behind that. However, updating the latest PHP version is so easy.
Log into your cPanel again. Locate and click on the Select PHP Version option.
Select the latest PHP version from the dropdown list we have pointed out in the below image. Hit the Apply button after that.
Step 08: Contact Your Hosting Provider
If you are still facing the problem, your hosting provider might have issues. They have installed or run any outdated program on the server, for why you might be facing the problem.
Send a message to their support team and ask for a solution. If they are a renowned and customer-centric hosting provider, you’ll surely get a solution without any doubt.
Final Words!
Failing to upload is an irritating problem for bloggers, eCommerce businesses, news portals, and any website doing content marketing. If you know the above recipe, it will be easy for you to reach a solution in a short time.
Hope our guide has come to your help. But we have a solution for you before ending this discussion. Make sure you have backups of your website before you going to touch any sensitive parts like the File Manager in cPanel.
If you mistakenly commit wrongdoing, the backup will help recover your site instantly. Thanks for reading us.
Leave a Reply