
Changing the font in WordPress can have a significant impact on the visual appearance of your website. It can help you improve user experience, boost your readability score, and align with your brand identity.
Besides, any website consists of multiple pages and numerous sections. To stand out on certain pages and sections from others, you’ll need to change fonts. WordPress offers you various ways to change the font of a website.
We’ll break down the easiest methods in this article so any can implement them on their website. So, let’s jump into the discussion of how to change font in WordPress.
You can change fonts in WordPress from the site editor, page editor, and customizer. We’ll explain all the methods in the discussion below. Keep reading them.
Method 01: Change Fonts in the Site Editor
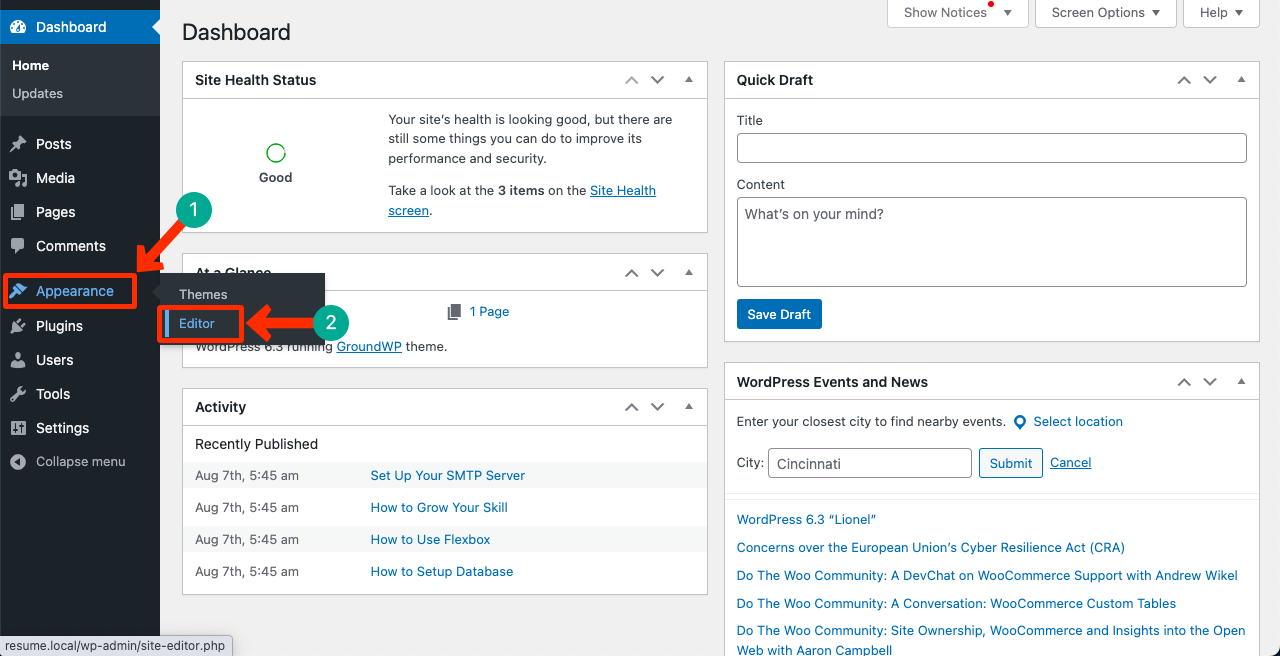
This method will apply if your WordPress theme has the site editor option. Check if you have the Editor option available in the Appearance section.
Our website currently has the theme GroundWP installed and activated. We’ll explain the method using this theme.
Navigate to WordPress dashboard > Appearance > Editor.
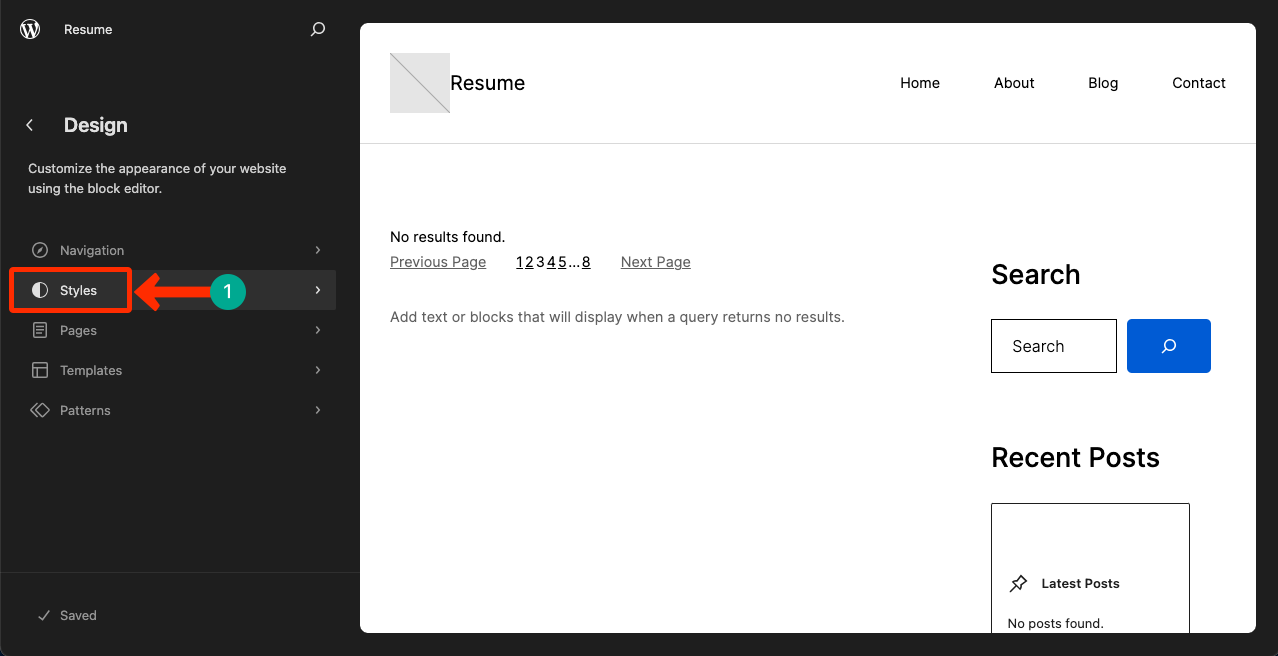
Look at the left sidebar and locate the option Styles. Click on it.
You’ll see a pencil-shaped icon named Edit Styles. Click the icon.
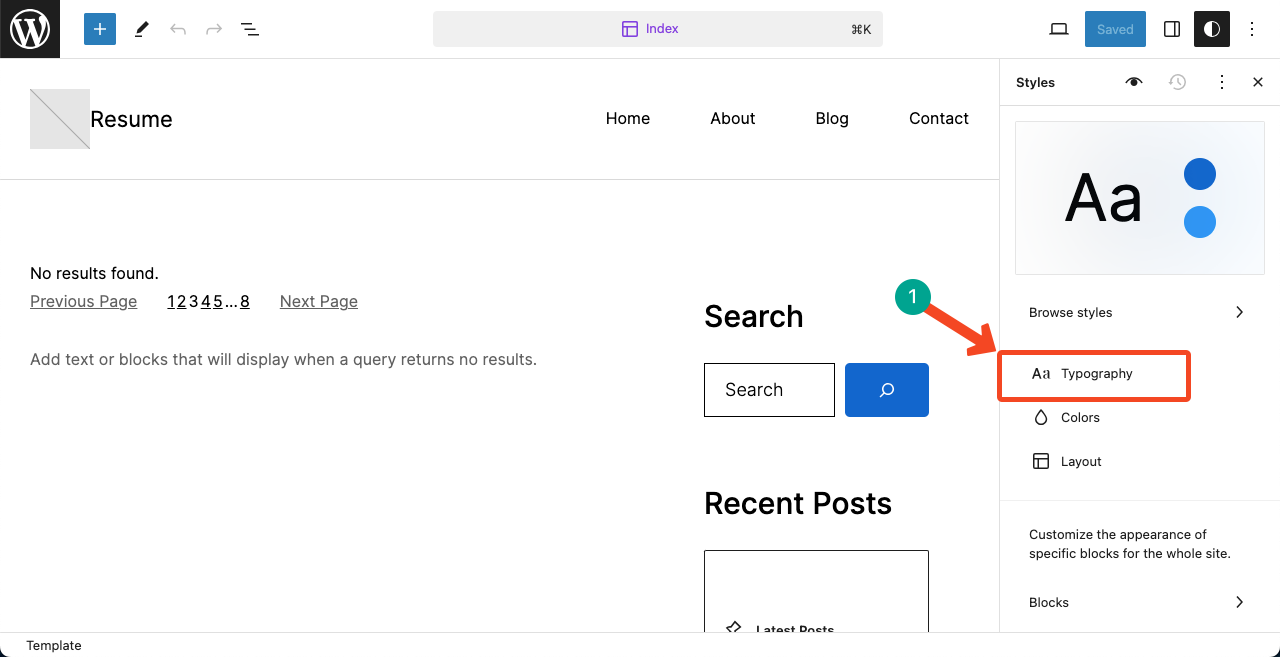
Now, look at the right sidebar. You will find the Typography option. By clicking here, you will find all the necessary options to change fonts, font size, and font color. Hope you can do the rest.
Method 02: Change Fonts in the Page Editor
The same rule applies here too. First, you must check if your theme has the page editor option built-in. We are now using the theme Blocksy as it has the option built-in.
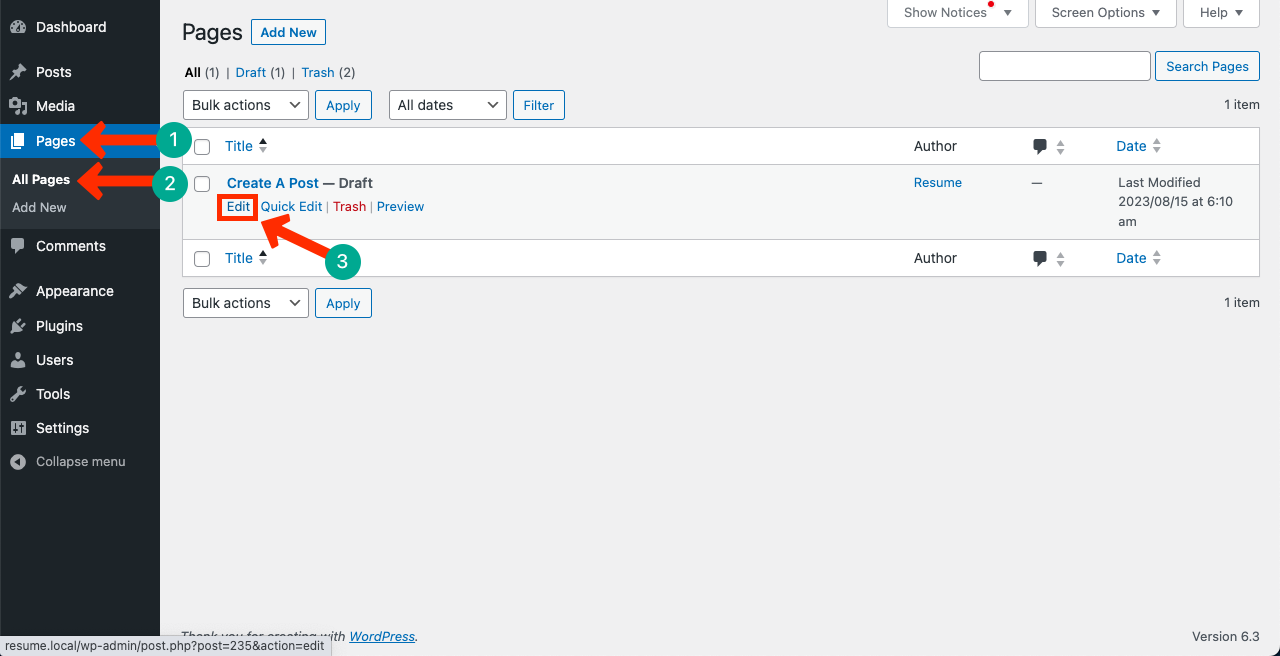
Go to Pages > All Pages. Open a page by clicking the Edit button.
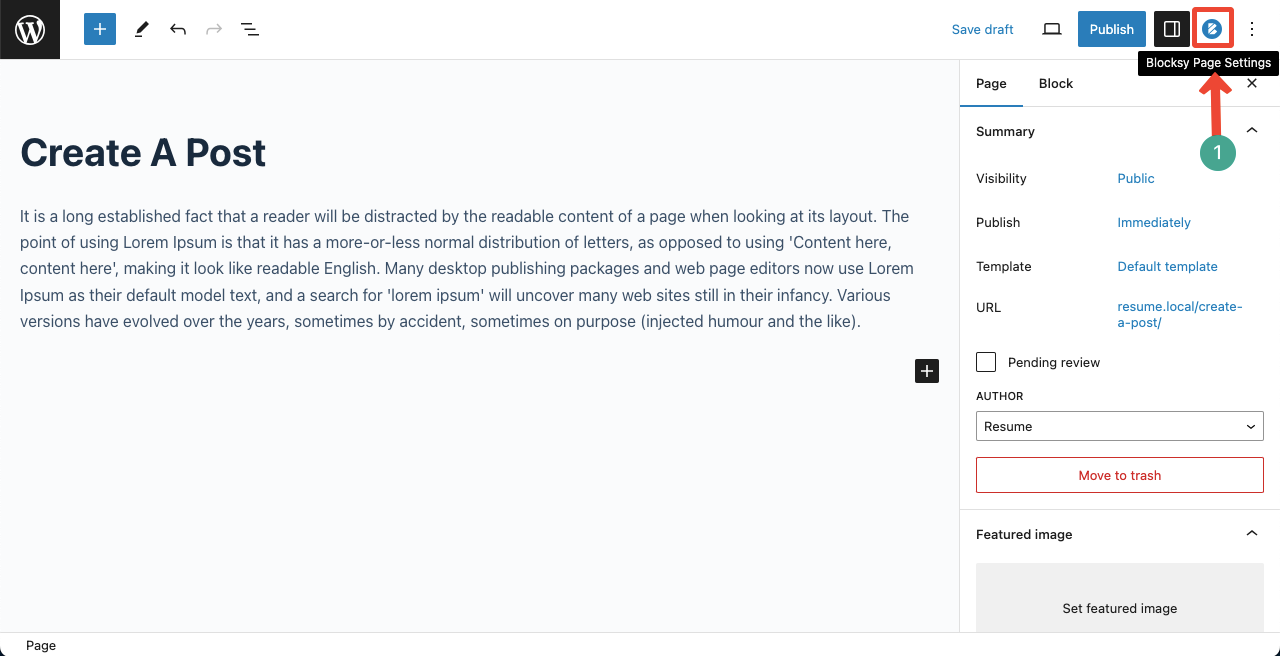
You’ll get the page edit settings in the top-right corner. Since we have the Blocksy theme installed, we can see the option Blocksy Page Settings. You may see this option with a different logo and name if you have a different theme installed.
Find the respective option and click on it.
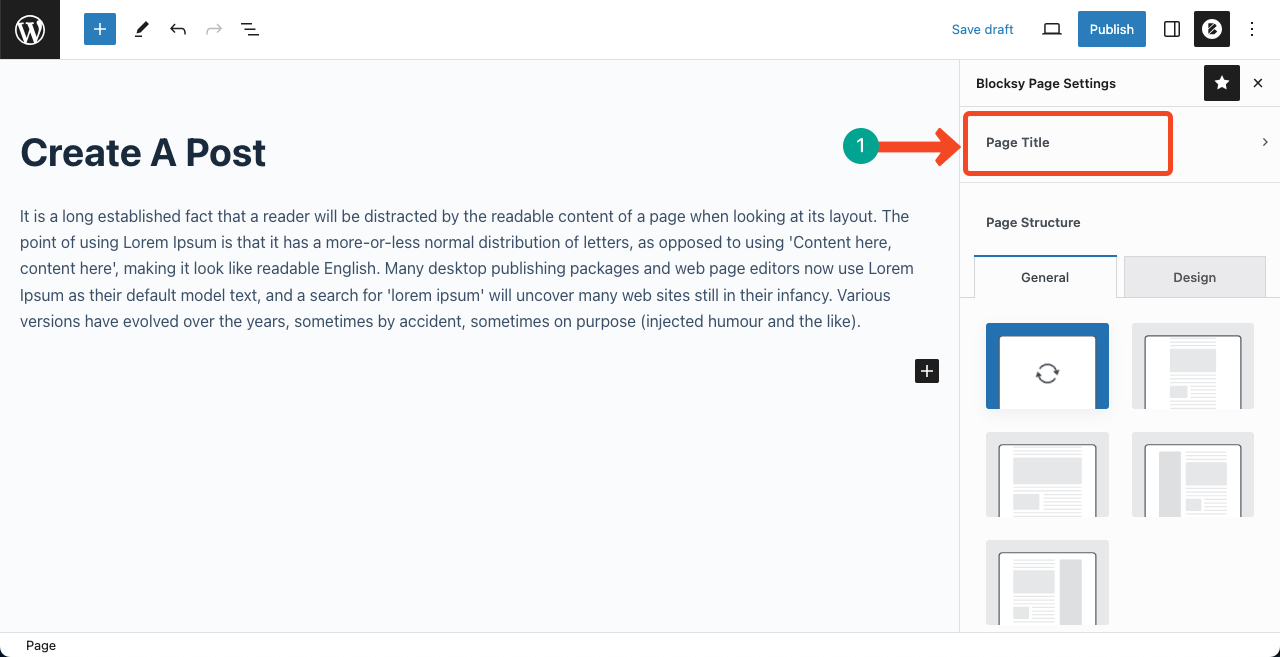
A new sidebar will open. Click the Page Title option on it. You may get this option with a different name based on your theme.
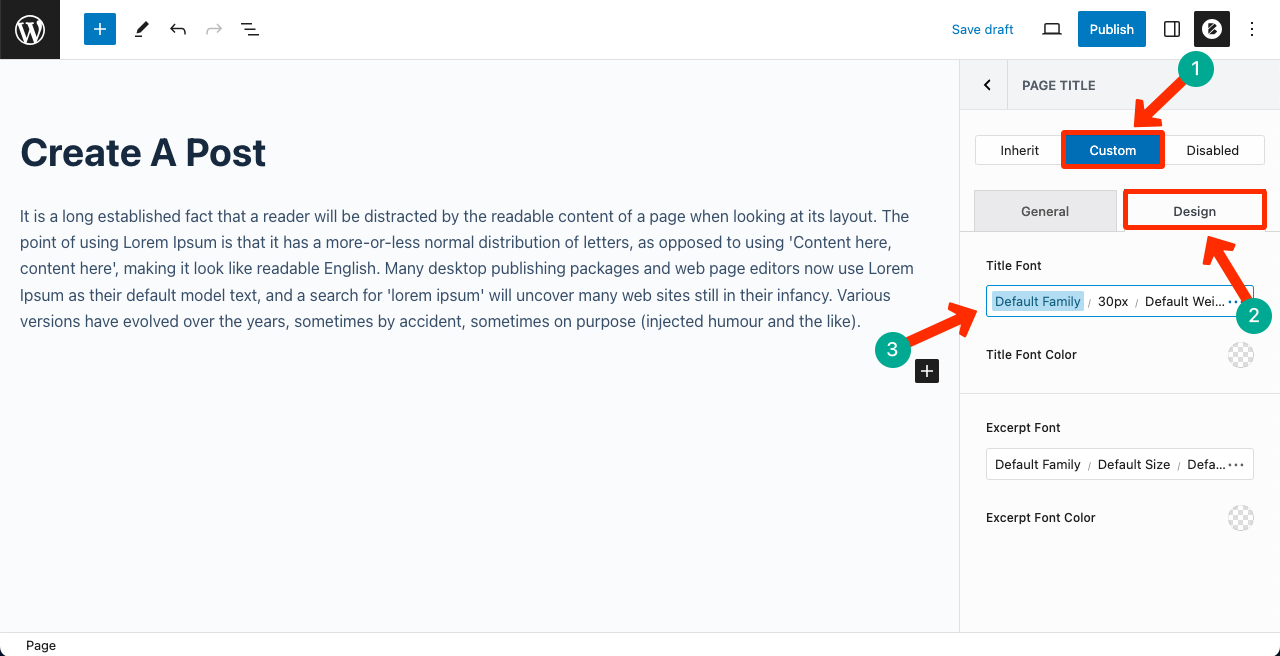
Come to the Custom tab. Select the Design tab after that. You’ll see font boxes based on the number of headers you have on your page.
You can select a different font for all headings, titles, and text types from each box. You can also change their font size, boldness, and stylization.
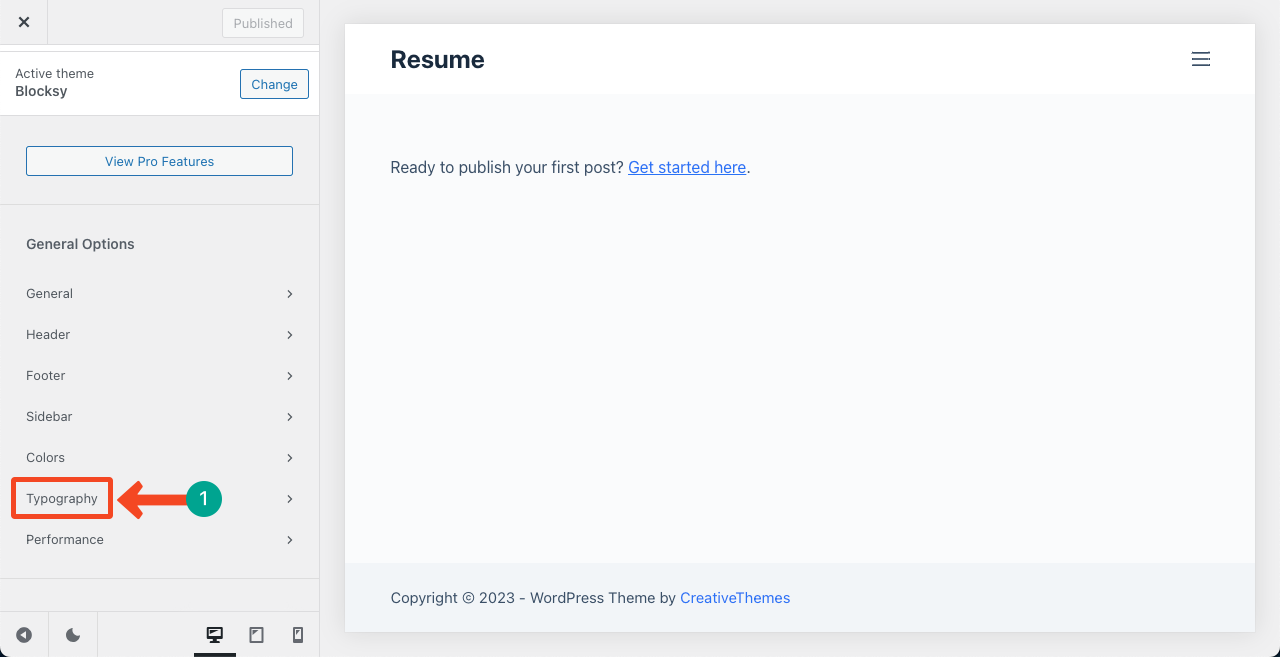
Method 03: Change Fonts in the Customize Option
Most WordPress themes have the Customize option available. You can change fonts from here as well. Navigate to Appearance > Customize.
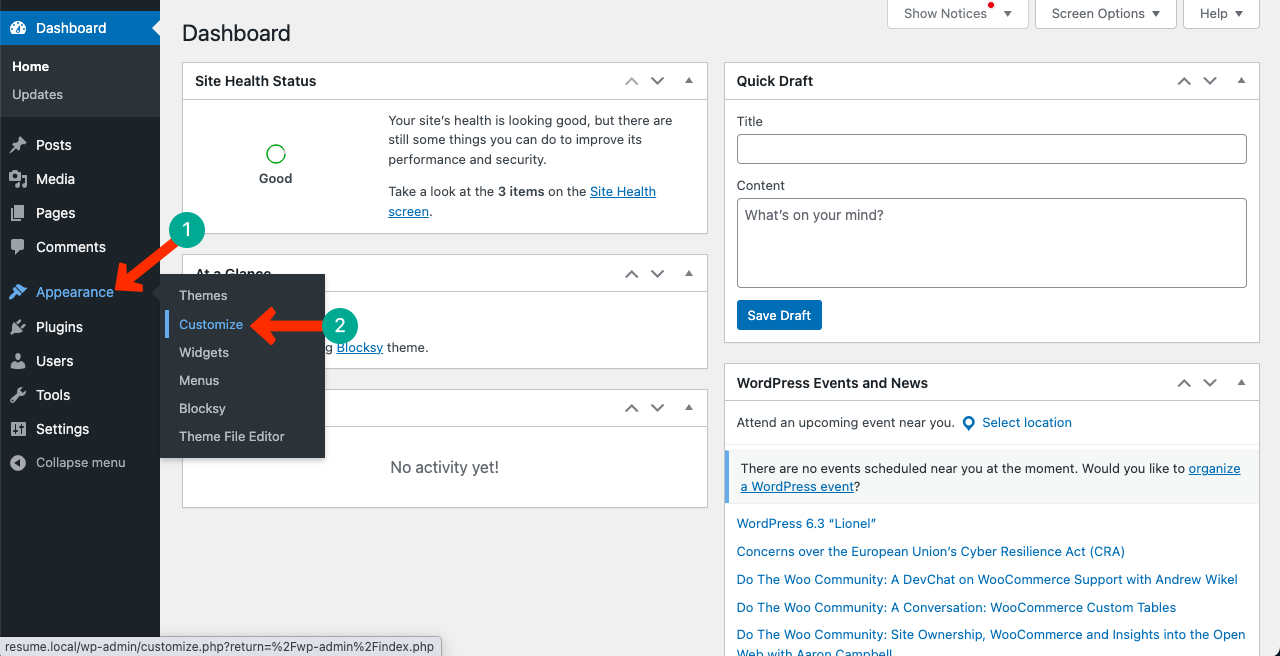
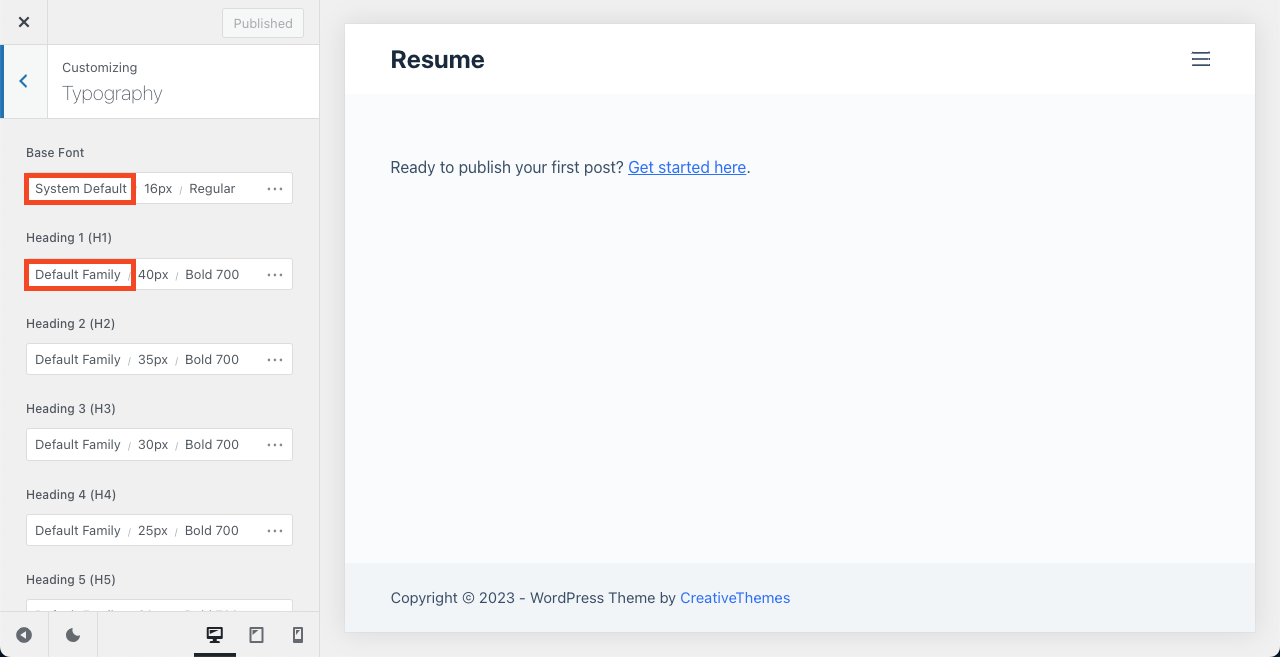
Select the Font or Typography option from the left sidebar. Based on your theme, this option may be named as font or typography.
You’ll get options to set the font style and family differently for every section on your website. Hope you can do the rest.
Thus, you can change fonts on your WordPress website.
Conclusion
Hope you enjoyed this discussion. We have some recommendations for you regarding changing WordPress fonts. Although you can select different fonts for each page and section, this is not a best practice.
Too many variations can significantly reduce the readability score and create eye-screamings. Better if you use maximum two-three fonts. Check out our guide on how to change the text font color in WordPress.
Leave a Reply