There may be numerous reasons for you to learn How to Make WordPress Site Private.
If you use your blog for advertising purposes or merely to share your travels and opinions with friends and relatives, the fact that your blogs are public is appealing to the majority of people. More people are visited by Google and by other search engines, which increases the popularity of your articles and perhaps increases the advertising revenue.
However, there may be some moments where you prefer privacy over revenue. We are here to rescue everyone. In this article, we have compiled some of the easiest ways you can make your WordPress site private.
Reasons to make your WordPress site private
Many established website owners will keep a newly launched website secret until it is ready to go live. This enables the user to populate a new platform with material and troubleshoot any problems without the need for an audience. The webmaster can only make his site available after adding material and finalizing the theme.
Consider a website created for family members or for use inside a small business. This types of websites contain material that is only meant for a small number of people. In situations like this, making a WordPress account private forever is perfectly acceptable and frequently recommended. Decide if you want to hide any or all of your website before you start. The right solution can be determined by your requirements.
How to Make WordPress Site Private Without Plugin
This might be one of the easiest ways to private your WordPress Site. In this method, we will modify the default settings of WordPress to achieve the desired result. Here are the steps you need to follow:
- Login to WordPress Dashboard.
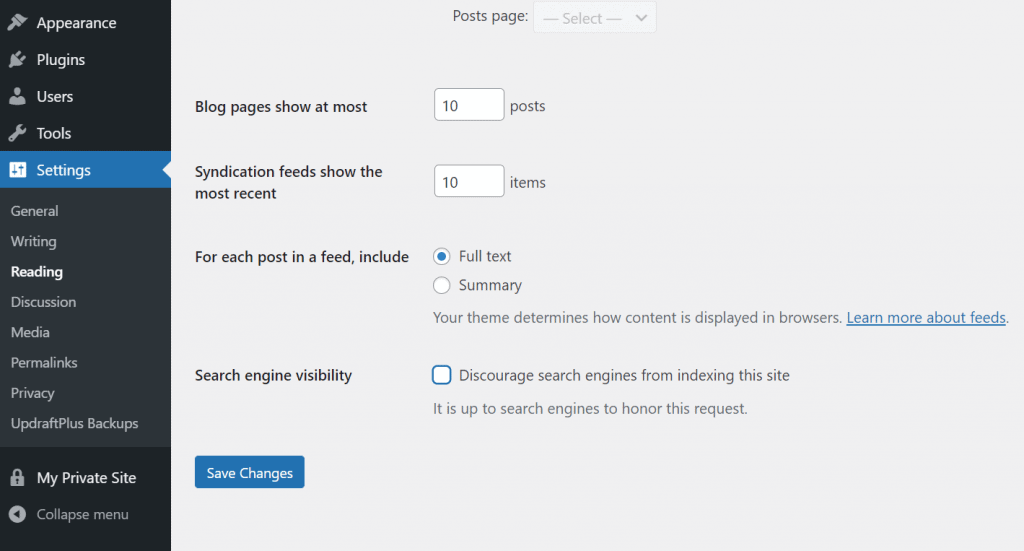
- Now navigate to Settings >> Reading.
- Here you will find an option “Discourage search engines from indexing this site” Just check it.

- Finally, click “Save Changes.” ( This option will stop the search engine indexing which will hide your website from search engines.)
Hope this method was a help.
How to Make WordPress Site Private Using My Private Site Plugin
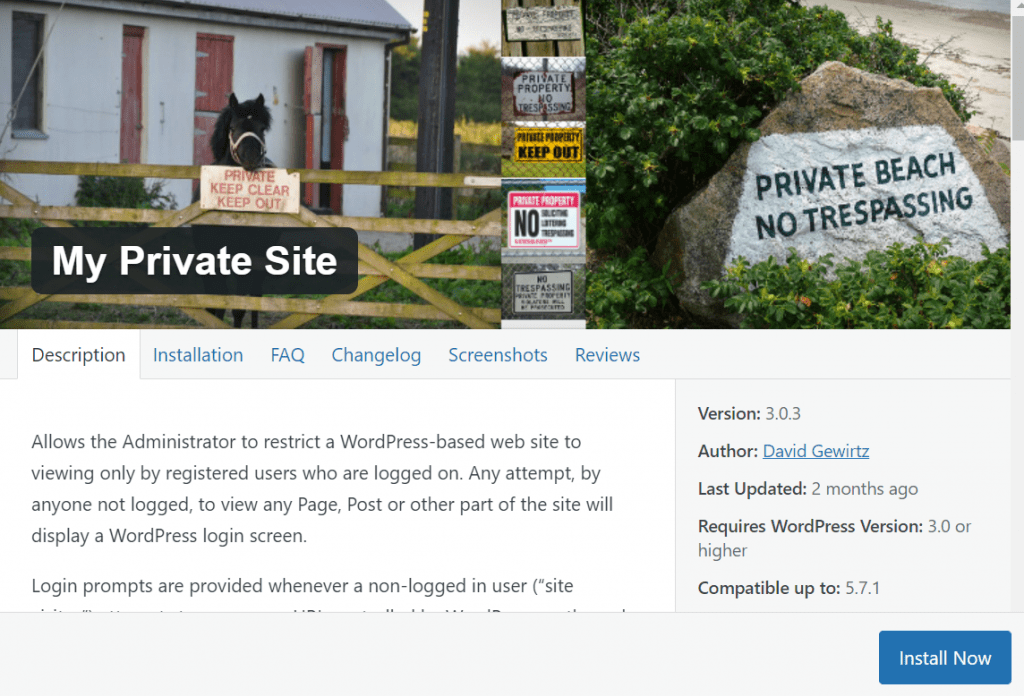
In this method, you first need to install My Private Site Plugin and then modify some settings.
Here are the steps you need to follow:
- Login to WordPress Dashboard.
- Navigate to Plugins >> Add New.
- Now, Search for “My Private Site Plugin” and Install it.
- After you finish installing, Active the plugin.

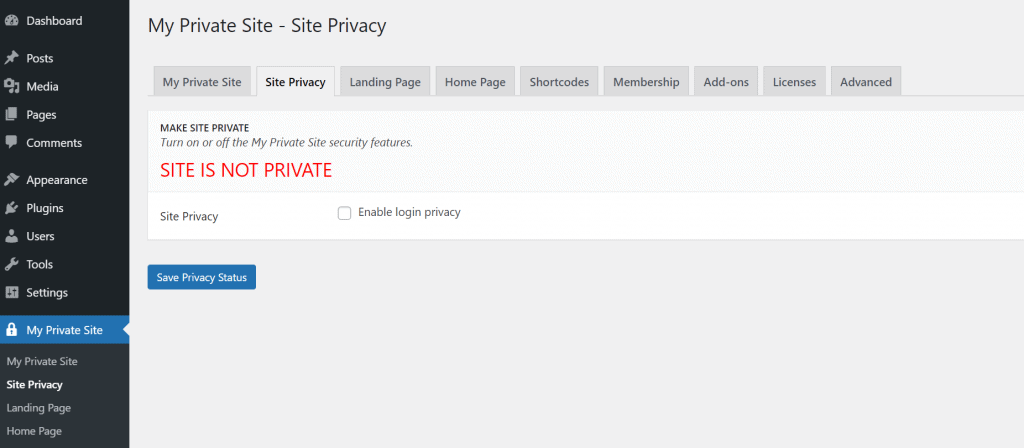
- Once you active the My Private Site Plugin, Go to Private Site and locate Site Privacy tab.
- Here you need to check the box which resembles Private Site.

- Finally, click on “Save Privacy Status” to save the changes.
You can select which page users can see when they log in under the “Landing Location” section. The plugin would, by default, redirect them to the same URL they requested before logging in. You can also guide visitors to your WordPress site’s homepage, WordPress admin dashboard, or some other URL.
Sum Up
Your whole WordPress site will be made private through My Private Site. Even if they know the URL, no one would visit the website as long as it is active. This added level of security makes My Private Platform ideal for families and organizations who never want their content to be shared with the public and WordPress websites in development.
To summarize, We’ve gone through easy approaches to Make WordPress Site Private:
- Method 1: How to Make WordPress Site Private Without Plugin
- Method 2: How to Make WordPress Site Private Using My Private Site Plugin
We hope this detailed guide helped you to understand How to Make WordPress Site Private. And for the visitor who asked us to write an article on How to Hide a Page in WordPress. We have a dedicated article on this.
If you enjoyed this post, subscribe to our WordPress video tutorials on YouTube Channel. Remember to follow us on Pinterest.
We accept any type of suggestions from the visitors because it always motivates us to improve. Feel free to comment below.
